
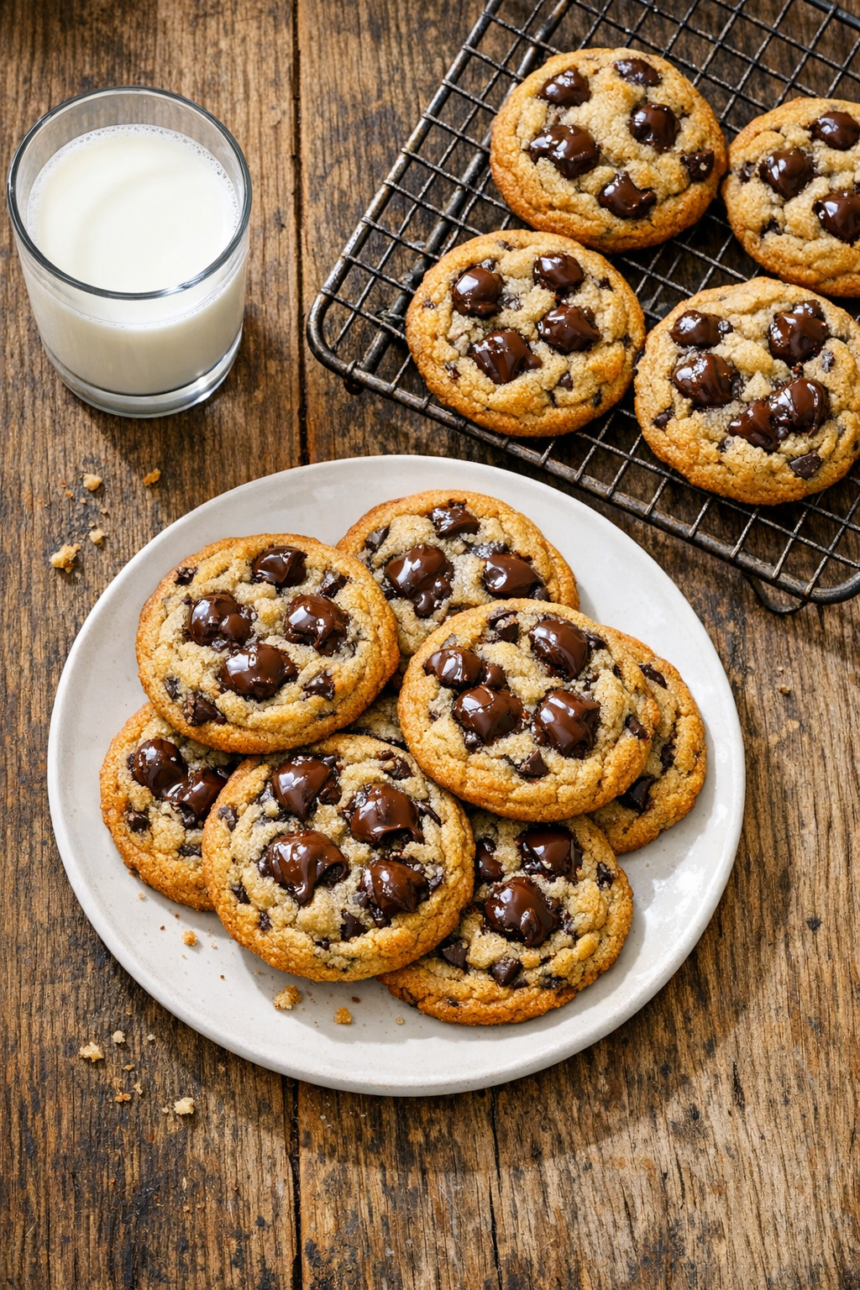
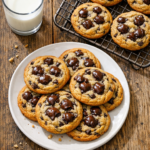
Did you know that letting cookie dough rest overnight can deepen flavor by up to 30%? That’s the secret behind these sourdough chocolate chip cookies, a recipe that transforms simple pantry staples into bakery-quality treats with fudgy centers, crispy golden edges, and pools of melty chocolate in every bite. The subtle tang from the sourdough discard adds complexity that you simply can’t find in traditional chocolate chip cookies, while the slow fermentation process enhances both taste and texture.
After testing this recipe more than fifty times, I’ve cracked the code on how to avoid the cakey texture that plagues most sourdough cookie recipes. The result is a soft, chewy cookie that stays moist for days and tastes even better reheated. These cookies are incredibly forgiving and require no stand mixer, just a whisk, a bowl, and a little patience. Whether you’re a sourdough enthusiast looking to use up discard or simply craving the ultimate chocolate chip cookie, this recipe delivers on every level. Let’s dive into how you can create these irresistible treats in your own kitchen.
Ingredients List
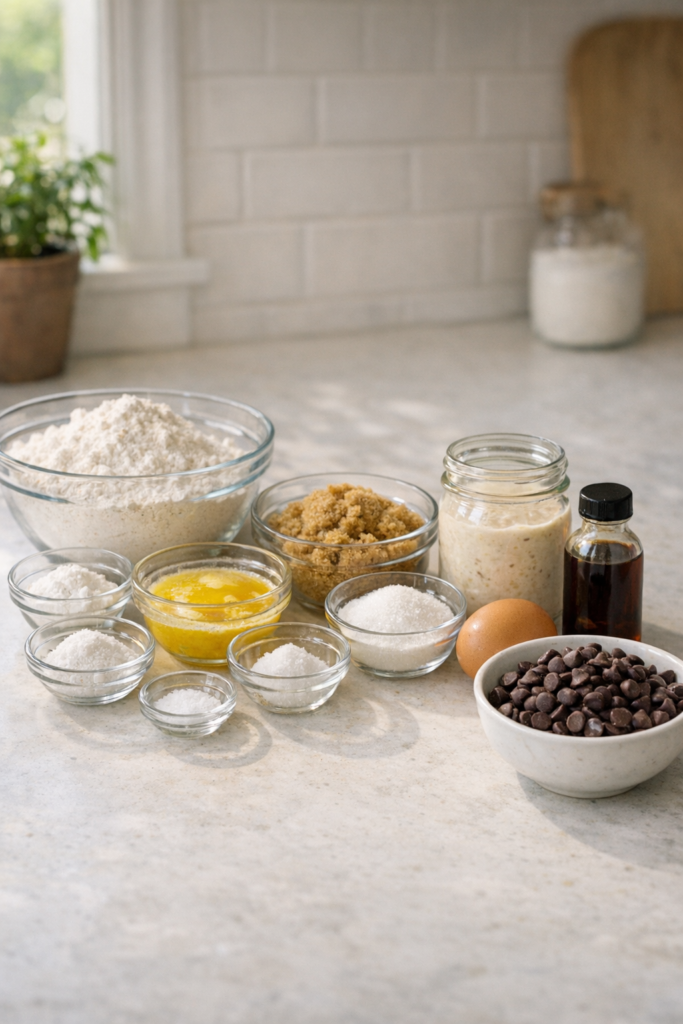
Gathering your ingredients before you start ensures a smooth baking process. Here’s everything you’ll need to create 16 large, bakery-style sourdough chocolate chip cookies:
- 265g (2 cups + 2 tablespoons) all-purpose flour: Measured correctly using the spoon-and-level method to avoid dense cookies
- 4g (1½ teaspoons) cornstarch: The secret ingredient that creates a softer, more tender crumb
- 3g (½ teaspoon) baking soda: Provides lift and helps achieve golden edges
- 2g (½ teaspoon) baking powder: Extra insurance for the perfect rise
- 4g (¾ teaspoon) fine sea salt: Balances sweetness and enhances chocolate flavor
- 170g (12 tablespoons) unsalted butter: Melted and cooled to 90°F for fudgy centers
- 180g (1 cup) packed light brown sugar: Adds moisture and a hint of molasses depth
- 70g (⅓ cup) granulated sugar: Creates crispy edges and balances texture
- 125g (½ cup) sourdough discard: Should be ribbon-thin consistency; add 1 tablespoon warm water if too thick
- 50g (1 large) whole egg plus 18g (1 extra) yolk: Adds richness and structure
- 10g (2 teaspoons) vanilla extract: Homemade or store-bought both work beautifully
- 240g (1⅓ cups) semisweet chocolate chips: Plus an extra ¼ cup reserved for decorating tops after baking
Pro tip: Using a kitchen scale ensures consistent results every time. If your brown sugar feels dry or clumpy, microwave it for 10 seconds with a damp towel placed on top to rehydrate it perfectly.
Step-by-Step Instructions
Step 1: Combine Your Dry Ingredients
Start by whisking together your all-purpose flour, cornstarch, baking soda, baking powder, and salt in a medium bowl. Make sure everything is thoroughly combined, as this ensures even distribution of leavening agents throughout your cookies. Set this bowl aside while you prepare the wet ingredients.
Step 2: Mix the Wet Ingredients
In a large mixing bowl, combine your melted and cooled butter with both sugars. Here’s a time-saving trick: instead of fully melting the butter and waiting for it to cool, partially melt it in the microwave and then stir to complete the melting process. This allows it to cool naturally without the wait. Whisk the butter and sugars together for about 30 seconds until the mixture resembles caramel and becomes well blended.
Step 3: Add Eggs and Vanilla
Crack in one whole egg plus one egg yolk (save that white for tomorrow’s omelet), then pour in your vanilla extract. Whisk everything together until the mixture becomes thick and glossy, taking on a beautiful caramel-like appearance. This step should take about 20 seconds of vigorous whisking.
Step 4: Incorporate the Sourdough Discard
Add your room-temperature sourdough discard to the wet mixture. The consistency should be ribbon-thin, meaning it falls smoothly from your measuring cup. If your starter is too thick, whisk in one tablespoon of warm water before measuring. Blend until the mixture is completely smooth and uniform.
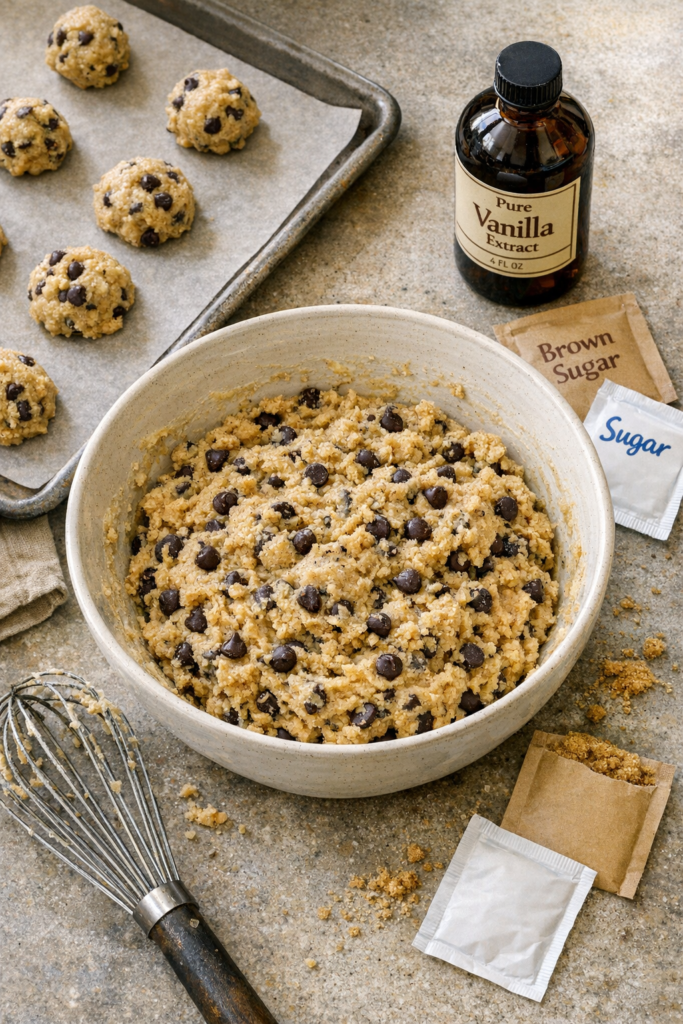
Step 5: Fold in Dry Ingredients
Pour the dry ingredients into the wet ingredients and gently fold with a spatula. This is crucial: stop mixing the moment those flour streaks disappear. Over-mixing develops gluten and creates tough, cakey cookies rather than the tender texture we’re after. The entire folding process should take less than a minute.
Step 6: Add Chocolate Chips
Gently fold in most of your chocolate chips, reserving about ¼ cup for decorating later. This reserved portion is the secret to achieving that professional bakery look. Once the chocolate is evenly distributed, cover the bowl tightly with plastic wrap and refrigerate.
Step 7: Chill the Dough
Refrigerate your dough for a minimum of 4 hours, though overnight (12-24 hours) produces the best flavor as the sourdough continues to ferment slowly. You can chill the dough for up to 48 hours, which develops even deeper, more complex flavors. Chilling also prevents the cookies from spreading into flat puddles during baking.
Step 8: Portion and Shape
Preheat your oven to 350°F (175°C). For 16 large cookies, portion out 65-70 grams of dough per cookie using a kitchen scale for consistency. If you prefer smaller cookies, portion 45 grams each. Place the dough portions on two parchment-lined baking sheets, spacing them at least 3 inches apart to allow for spreading. Roll each portion into a ball with your hands (they don’t need to be perfectly round).
Step 9: Bake to Perfection
Bake one sheet at a time in the center of your fully preheated oven. This is important: baking two sheets simultaneously, even with rotation, produces uneven results. Bake for 12-15 minutes for large cookies or 10-12 minutes for smaller ones. The cookies are done when the edges turn slightly golden and the centers no longer look wet and glossy, though they should still appear soft. Do not over-bake if you want soft cookies.
Step 10: Create Bakery-Style Tops
The moment your cookies come out of the oven, immediately press those reserved chocolate chips into the tops. This game-changing technique creates dimension, adds extra chocolate, and gives your cookies that professional, bakery-quality appearance. The chips will melt slightly and sink into the warm dough, creating gorgeous pools of melted chocolate.
Step 11: Cool Properly
Let the cookies rest on the baking sheet for 5 minutes. Since these are soft cookies, moving them too soon can cause breakage. After 5 minutes, transfer the entire parchment sheet with cookies to a cooling rack. Check the bottoms: they should be barely golden, which indicates perfect doneness.
Healthier Alternatives for the Recipe
While these sourdough chocolate chip cookies are already packed with the benefits of fermented sourdough, you can make simple swaps to suit various dietary preferences without sacrificing flavor:
- Reduce sugar: Cut the granulated sugar by 2 tablespoons (30g) for a less sweet cookie that still maintains proper texture
- Whole grain option: Replace up to half the all-purpose flour with white whole wheat flour for added fiber and nutrients
- Dark chocolate swap: Use 70% dark chocolate chips instead of semisweet for antioxidants and reduced sugar
- Coconut sugar substitute: Replace brown sugar with coconut sugar for a lower glycemic option with caramel notes
- Butter alternative: Use refined coconut oil (melted and cooled) for a dairy-free version
- Add nutrients: Fold in 2 tablespoons of ground flaxseed or chia seeds for omega-3 fatty acids
- Portion control: Make smaller 45g cookies instead of 70g cookies to reduce calorie count per serving
Remember that the sourdough fermentation process already makes these cookies easier to digest than traditional versions, as the beneficial bacteria break down some of the gluten and starches during the chilling period.
Serving Suggestions
These versatile chocolate chip cookies shine in numerous serving scenarios. Here are creative ways to enjoy them:
- Classic with milk: Serve warm with a cold glass of whole milk for the ultimate nostalgic experience
- Ice cream sandwiches: Sandwich vanilla bean or salted caramel ice cream between two cookies and roll the edges in mini chocolate chips
- Coffee pairing: The subtle sourdough tang complements a strong espresso or cappuccino beautifully
- Dessert platter: Arrange on a wooden board with fresh berries, whipped cream, and chocolate sauce for dipping
- Reheated perfection: Microwave for 10-15 seconds until the chocolate becomes melty and gooey again
- Cookie crumble topping: Break cooled cookies into chunks and sprinkle over yogurt parfaits or oatmeal
- Gift packaging: Stack in clear cellophane bags tied with ribbon for homemade gifts that impress
- Breakfast treat: Pair with Greek yogurt and fresh fruit for an indulgent weekend breakfast
For parties or gatherings, display these cookies on a tiered stand and watch them disappear within minutes. The professional appearance and incredible flavor make them conversation starters.
Common Mistakes to Avoid
After perfecting this recipe through extensive testing, I’ve identified the most common pitfalls and how to avoid them:
- Over-mixing the dough: Stop folding the moment flour streaks disappear. Over-mixing develops gluten and creates tough, cakey cookies instead of tender ones
- Skipping the chill time: Rushing this step results in flat, spread-out cookies. The minimum 4-hour chill is non-negotiable for proper texture
- Using thick sourdough discard: If your starter is too thick, it throws off the moisture balance. Always thin to ribbon consistency with warm water if needed
- Baking two sheets at once: Even with rotation, one batch always bakes unevenly. Be patient and bake one sheet at a time
- Over-baking: These cookies continue cooking on the hot baking sheet. Remove them when centers still look slightly underdone
- Incorrect butter temperature: If butter is too hot when mixed with sugar, it can cook the eggs. Always cool to 90°F or room temperature
- Measuring flour incorrectly: Scooping flour directly from the bag compacts it, adding too much. Always spoon flour into your measuring cup and level off
- Crowding the baking sheet: Cookies need 3 inches of space to spread properly without merging into each other
Following these guidelines ensures your first batch turns out as perfectly as your fiftieth. Using a kitchen scale eliminates most measurement errors entirely.
Storing Tips for the Recipe
Proper storage keeps these sourdough chocolate chip cookies soft and delicious for days. Here’s how to maximize freshness:
- Room temperature storage: Keep cookies in an airtight container at room temperature for up to 5 days. Place a piece of bread in the container to maintain moisture
- Refrigeration: Store in the refrigerator for up to 10 days in an airtight container. Reheat for 10-15 seconds in the microwave before serving
- Freezing baked cookies: Freeze completely cooled cookies in a single layer on a baking sheet, then transfer to freezer bags. They’ll keep for up to 3 months. Thaw at room temperature or reheat from frozen
- Freezing cookie dough: After portioning and rolling into balls, freeze on a baking sheet, then transfer to freezer bags. Bake directly from frozen, adding 2-3 minutes to baking time
- Reheating for freshness: The best way to revive day-old cookies is a 10-second microwave burst, which melts the chocolate and restores that just-baked texture
- Layering in containers: If stacking cookies, place parchment paper between layers to prevent sticking
- Dough refrigeration: Unbaked dough keeps in the refrigerator for up to 4 days, allowing you to bake fresh cookies on demand
Many bakers find these cookies actually improve in flavor after a day or two as the sourdough continues to work its magic even after baking.
Why This Recipe Works
Understanding the science behind these sourdough chocolate chip cookies helps you appreciate why each ingredient and step matters:
The cornstarch creates a tender crumb by interfering with gluten development, while the combination of baking soda and baking powder provides the perfect amount of lift. Brown sugar adds moisture and chewiness through its molasses content, while granulated sugar promotes crispy edges through caramelization.
Melted butter is the key to fudgy centers. Unlike creamed butter, which incorporates air for cakey textures, melted butter coats flour proteins more thoroughly, limiting gluten formation. The extra egg yolk adds richness and fat that keeps cookies soft.
The sourdough discard contributes more than just tang. The fermentation process produces organic acids and enzymes that break down proteins and starches, creating complex flavors and improving digestibility. The overnight rest allows these beneficial compounds to develop fully, resulting in deeper, more sophisticated taste profiles.
Chilling the dough serves multiple purposes: it solidifies the fat, preventing excessive spreading; allows flour to fully hydrate for better texture; and gives time for flavors to meld and deepen through continued fermentation.
Conclusion
These sourdough chocolate chip cookies represent the perfect marriage of traditional baking and modern sourdough techniques. With their fudgy centers, crispy edges, pools of melted chocolate, and subtle tangy complexity, they’ve earned their place as the ultimate chocolate chip cookie recipe. The process is straightforward, requires no special equipment beyond a whisk and bowl, and produces consistent, bakery-quality results every single time.
Whether you’re using up sourdough discard or simply seeking the best chocolate chip cookie you’ve ever tasted, this recipe delivers on every promise. The overnight rest develops incredible depth of flavor, while the simple techniques ensure even beginner bakers achieve professional results. Don’t forget that game-changing final touch: pressing chocolate chips into the warm cookies creates visual appeal that matches the extraordinary taste.
Now it’s your turn to experience these incredible cookies. Gather your ingredients, embrace the overnight rest, and prepare to bake the chocolate chip cookies that will become your new gold standard. Share your results, tag your photos, and join the community of bakers who’ve discovered that sourdough and chocolate chips are truly meant to be together.
Frequently Asked Questions
Can I use active sourdough starter instead of discard?
Yes, you can absolutely use active fed starter instead of discard. The difference is minimal in this recipe since the cookies bake at high heat, which stops fermentation activity. However, using discard is more economical and prevents waste, making it the preferred option for most bakers. Just ensure your starter or discard is at room temperature and has that ribbon-thin consistency.
Why do my sourdough cookies turn out cakey instead of chewy?
Cakey texture typically results from too much flour or over-mixing the dough. Make sure you’re measuring flour correctly using the spoon-and-level method, or better yet, use a kitchen scale for accuracy. Also, stop mixing the moment flour streaks disappear. Over-mixing develops gluten, which creates a cake-like structure. Finally, don’t over-bake; remove cookies when centers still look slightly soft.
How long do I really need to chill the dough?
The minimum chill time is 4 hours, but overnight (12-24 hours) produces noticeably better results. The extended rest allows the sourdough to develop deeper, more complex flavors through continued fermentation. It also ensures the butter solidifies completely, preventing excessive spreading. You can chill up to 48 hours for even more pronounced sourdough tang and developed flavor.
Can I make these cookies gluten-free?
While this specific recipe relies on all-purpose flour for structure, you can experiment with a 1:1 gluten-free baking flour blend. However, you’ll also need to use gluten-free sourdough starter. The texture may differ slightly from the original, potentially becoming more crumbly. Adding an extra egg yolk can help improve binding in gluten-free versions.
What’s the best way to reheat these cookies?
For the ultimate fresh-baked experience, microwave individual cookies for 10-15 seconds. This melts the chocolate chips and restores that soft, gooey texture. Alternatively, reheat in a 300°F oven for 3-5 minutes. The microwave method is faster and produces that irresistible melted chocolate effect that makes these cookies so special.
Can I freeze the unbaked cookie dough?
Absolutely. After portioning and rolling the chilled dough into balls, freeze them on a baking sheet until solid, then transfer to freezer bags. They’ll keep for up to 3 months. When ready to bake, place frozen dough balls on your baking sheet and add 2-3 minutes to the baking time. No need to thaw, which makes these perfect for baking fresh cookies on demand.
Why do I need both baking soda and baking powder?
The baking soda reacts with the acidic sourdough discard to provide lift and help achieve golden-brown edges. The baking powder provides additional insurance for proper rise, especially since the sourdough’s acidity level can vary depending on feeding schedules. Together, they create the ideal texture with both chewiness and slight lift, preventing flat, dense cookies.
What if my brown sugar is hard and clumpy?
Place the brown sugar in a microwave-safe bowl, cover with a damp paper towel, and microwave for 10 seconds. The moisture from the towel will rehydrate the sugar, making it soft and packable again. Alternatively, store brown sugar with a terra cotta brown sugar saver or a slice of bread to maintain moisture long-term.
Tools You’ll Need
Essential Kitchen Tools
Everything you need to make cooking easier and more enjoyable


Must Try Recipes
- Pumpkin Chocolate Chip Muffins
A spiced twist on classic chocolate chip treats. - Chocolate Chip Shortbread
Buttery, crumbly cookies loaded with chocolate chips. - Chocolate Sugar Cookies
Soft sugar cookies with rich chocolate accents. - Coconut Orange Slice Cookies
Tropical flavored cookies with coconut and citrus. - Chewy Oatmeal Cookies
Hearty, chewy oats paired with sweet mix-ins.

Want to save this recipe?
Want to save this recipe? Enter your email below, and we'll send it straight to your inbox. Plus, receive new recipes every week!
Soft & Chewy Sourdough Chocolate Chip Cookies
- Total Time: 30 minutes
Description
Quick, crave-worthy cookies with a perfect balance of chew, crisp, and rich chocolate flavor.
Ingredients
- 2 cups + 2 Tbsp all-purpose flour (measured correctly)
- 1½ tsp cornstarch
- ½ tsp baking soda
- ½ tsp baking powder
- ¾ tsp fine sea salt
- 12 Tbsp unsalted butter, melted and cooled to 90°F
- 1 cup packed light brown sugar
- ⅓ cup granulated sugar
- ½ cup sourdough discard, ribbon-thin
- 1 large egg + 1 extra yolk
- 2 tsp vanilla extract
- 1⅓ cups semisweet chocolate chips, plus extra for topping
Instructions
- In a bowl, whisk together flour, cornstarch, baking soda, baking powder, and salt until evenly combined.
- In another bowl, whisk melted butter, brown sugar, and granulated sugar for 30 seconds, then add egg, yolk, and vanilla until smooth, followed by sourdough discard.
- Fold dry ingredients into the wet mixture until no streaks remain, then gently stir in chocolate chips. Cover dough and chill 4–48 hours for best flavor.
- Preheat oven to 350°F (175°C). Portion dough into 65–70 g balls for large cookies (or 45 g for smaller ones) and place 3 inches apart on parchment-lined baking sheets.
- Bake one sheet at a time: 12–15 minutes for large cookies, 10–12 minutes for small cookies, until edges are golden and centers look set but still soft.
- Immediately press extra chocolate chips into the tops for a bakery-style finish. Cool on the sheet for 5 minutes, then transfer (with parchment) to a rack.
- Prep Time: 10 minutes
- Cook Time: 20 minutes
- Category: Desserts
- Cuisine: American
Nutrition
- Serving Size: 16 large cookies
- Calories: 219 kcal
- Sugar: 17 g
- Sodium: 112 mg
- Fat: 11 g
- Saturated Fat: 6 g
- Unsaturated Fat: 3.5 g
- Trans Fat: 0.3 g
- Carbohydrates: 29 g
- Fiber: 1 g
- Protein: 2 g
- Cholesterol: 25 mg