
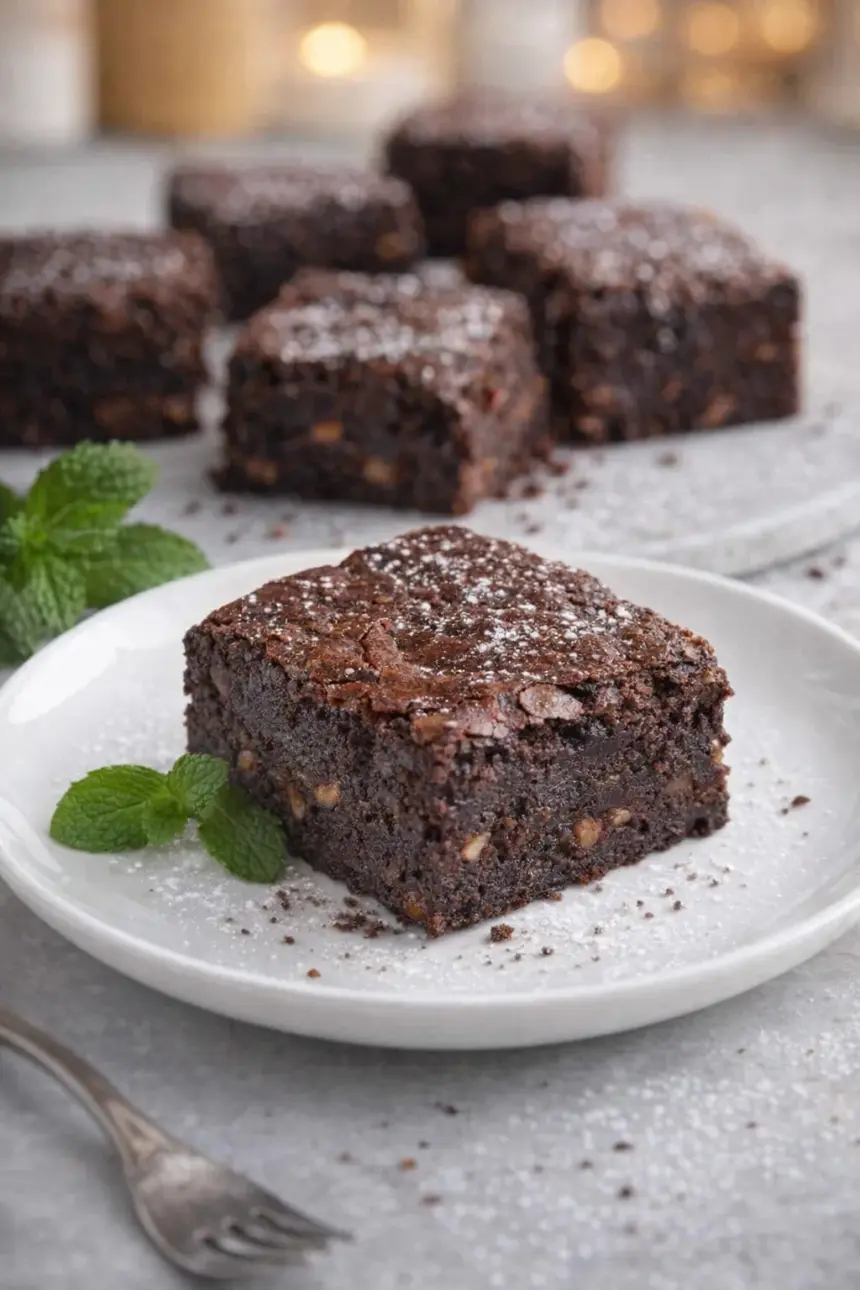
Most brownie recipes fail the home baker in one of two ways: they either demand melted chocolate bars and a double boiler, or they turn out flat, dry, and nothing like the fudgy squares you were imagining. This brownie recipe solves both problems at once. It comes together in a single bowl, skips the complicated chocolate-melting step entirely, and delivers gooey, thick brownies with that glossy crackled top that looks like it came from a bakery. With a 4.95-star rating from over 2,000 bakers, the results speak for themselves.
Why Most Homemade Brownies Fail (and What This Recipe Does Differently)
The biggest culprit behind dry, crumbly brownies is almost always too much flour. When you scoop flour directly from the bag with a measuring cup, you can pack in significantly more than the recipe intends. The fix is simple: use a kitchen scale and measure 120g exactly, or spoon flour into the cup and level it off with a knife.
The second common failure is skipping the vigorous whisk after adding sugar and cocoa to the melted butter. That 30-second whisk is not optional. It starts dissolving the sugar into the warm butter, and those dissolved sugar crystals migrate to the surface during baking to form the shiny, crackly top. No vigorous whisk, no crackle.
Overbaking is the third trap. Because this batter is so rich and thick, it looks underdone at the 35-minute mark. That slight wobble in the center is exactly what you want for fudgy brownies. Pull them too late and you lose the gooey interior that makes this recipe worth making.
Ingredients for This Brownie Recipe
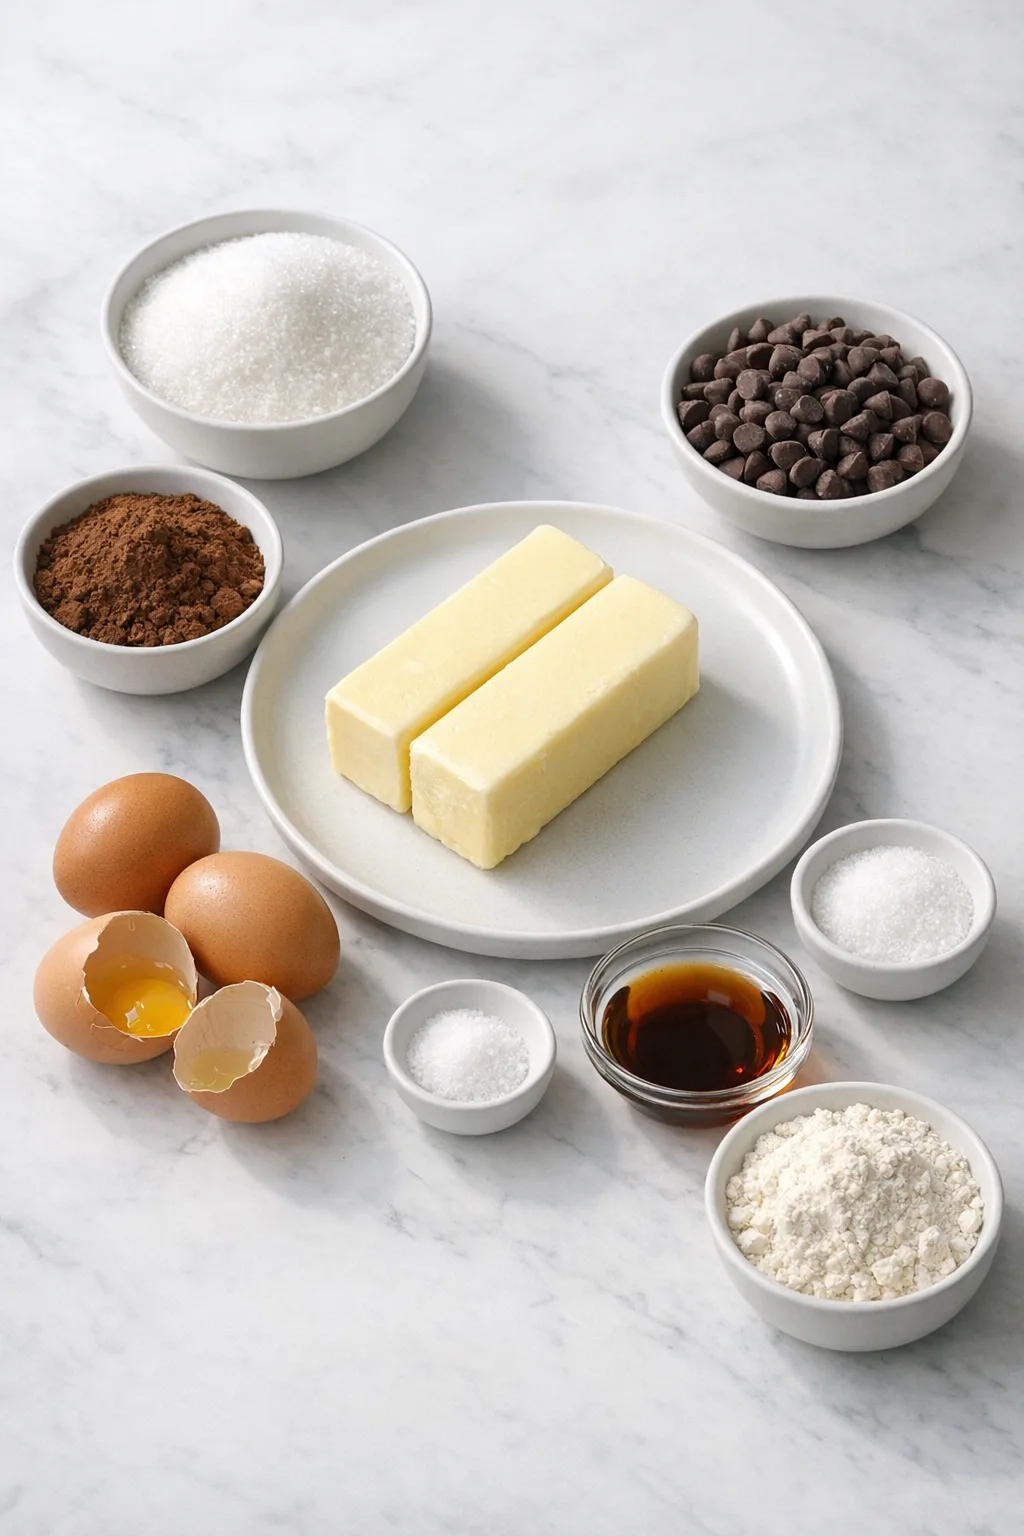
Here is everything you need, measured precisely from the recipe:
- 1 cup (226g) unsalted butter — butter provides fat, water, and milk solids that give these brownies their rich, dense texture. If you only have salted butter, reduce the added salt by about half a teaspoon.
- 2 cups (400g) granulated sugar — you can swap half for light or dark brown sugar for a subtle caramel undertone.
- ¾ cup (75g) unsweetened cocoa powder — natural unsweetened cocoa works well here. Dutch-processed cocoa will give you a slightly deeper, more fudgy result. A blend of both is a solid middle ground.
- 3 large eggs, room temperature — cold eggs can seize the warm butter mixture. If you forgot to take them out early, soak them in warm tap water for 10 minutes.
- 1 tablespoon vanilla extract — use real vanilla extract, not imitation. It pulls the chocolate flavor forward in a way that synthetic versions cannot replicate.
- 1 teaspoon salt
- 1 cup (120g) all-purpose flour
- 1½ cups (270g) semisweet chocolate chips — semisweet keeps the sweetness balanced. For a crunchier, more layered brownie, Peanut Butter Crunch Brownies take the add-in concept in a completely different direction if you want something with more textural contrast.
Step-by-Step Instructions
Step 1: Prepare Your Pan So Nothing Sticks
Preheat your oven to 350°F. Lightly grease an 8×8-inch baking pan with baking spray, then line it with parchment paper. To fit the parchment neatly, trim small diagonal cuts at each corner so it lies flat against the sides.
One thing to watch: if you skip the parchment and rely only on spray, the brownies will stick and tear when you try to remove them. The parchment is what lets the whole slab lift out cleanly in one piece.
Step 2: Build the Chocolate Base That Creates the Crackly Top
In a large Mixing Bowl, melt the butter in the microwave in 20-second intervals, stirring between each one, until fully melted, about 2 minutes. Add the granulated sugar and cocoa powder, then whisk vigorously for 30 seconds.
The mixture will look thick and grainy at first, almost like a dense paste. That is correct. The warmth from the butter starts dissolving the sugar, which is exactly what creates the shiny crust during baking. Whisk in the eggs, vanilla, and salt until the batter looks smooth and glossy.
If the butter has cooled too much before you add the sugar and cocoa, the mixture may seize into a lumpy mass. If that happens, microwave the bowl for 10 seconds and whisk again.
Step 3: Fold in the Flour and Chocolate Chips Without Overdeveloping the Batter
Add the flour and chocolate chips to the bowl. Switch from a Whisk to a spatula and fold everything together until the dry streaks of flour just disappear. Stop there. Overmixing at this stage develops gluten and can make your brownies tough rather than fudgy.
The batter will be thick and dense, almost like a very stiff chocolate mousse. Spread it into the prepared pan and push it toward the edges. You can scatter a few extra chocolate chips on top if you want. For a richer chocolate flavor variation, Homemade Nutella can be swirled into the batter at this stage, though unlike this recipe, that spread brings its own sweetness and hazelnut depth that changes the flavor profile noticeably.
Step 4: Bake to Your Preferred Texture
Bake for 35 to 40 minutes for super fudgy brownies, or up to 55 minutes for cakey brownies. To check doneness, insert a toothpick into the center. For fudgy brownies, it should come out with a small smear of batter or several moist crumbs. For cakey brownies, it should have just a few crumbs and be mostly clean.
You will know the brownies are ready when the edges look set and matte while the center still has the faintest give when you gently press the pan. The top should be glossy and crackled, not wet-looking. Let the brownies cool completely in the pan before slicing. Cutting too early is the most common reason brownies fall apart at the knife.
What Separates Good Brownies from Great Ones
- Use a metal pan. Metal conducts heat more efficiently than glass or ceramic, which means the batter cooks through to the center faster and the edges get that addictive crispness. If you use a glass pan, add 5 to 10 extra minutes to the bake time.
- Quality cocoa powder matters more than you think. Chocolate is the entire point of this recipe. A higher-quality cocoa powder will produce a noticeably richer result. If your cocoa is on the lower end, add 1 teaspoon of instant espresso powder to the melted butter mixture. It amplifies the chocolate flavor without tasting like coffee.
- Bloom the cocoa if you want extra depth. Adding the cocoa directly to the hot melted butter and letting it sit for a minute before whisking intensifies the chocolate flavor. It is not required here since the recipe is already deeply chocolatey, but it is a worthwhile step if you want to push the richness further.
- Room temperature eggs are not a suggestion. Cold eggs can cause the warm butter mixture to seize. The 10-minute warm water soak works every time if you forgot to plan ahead.
- Sift the cocoa powder. Cocoa powder clumps easily, and those lumps do not always break up during mixing. A quick sift before adding it to the bowl takes 30 seconds and guarantees a smooth, even batter.
Serving Ideas Worth Trying
These brownies hold up well on their own, but a few additions take them further. Once cooled, a layer of Chocolate Ganache poured over the top creates a glossy, truffle-like finish that sets into a firm shell. The ganache deepens the chocolate intensity in a way that plain brownies cannot match on their own.
A dusting of powdered sugar right before serving gives a clean, simple finish. Warm brownies with a scoop of vanilla ice cream is the classic pairing, and the contrast between the cold ice cream and the dense, fudgy square is hard to beat. For a slightly sharper contrast, a drizzle of raspberry sauce cuts through the richness nicely.
Storage and Keeping Them Fresh
Store brownies at room temperature in an airtight container for 3 to 4 days. They actually taste better on day two once the flavors have had time to settle. For longer storage, keep them in the refrigerator for an extra day or two.
These brownies freeze well. Wrap individual squares in plastic wrap, then in aluminum foil, and store in a freezer-safe bag. Thaw in the refrigerator for a few hours before eating. Personally, I find that a 10-second microwave warm-up after thawing brings back that fresh-from-the-oven fudginess better than letting them come to room temperature on the counter.
FAQs
Can I use a 9×13-inch pan for this brownie recipe?
Yes, but double the recipe first. A 9×13 pan has roughly twice the surface area of an 8×8, so a single batch will spread too thin. With a doubled batch, increase the bake time by 5 to 10 minutes and watch for the toothpick test rather than relying on the clock.
Why did my brownies come out crumbly instead of fudgy?
The most likely cause is too much flour. Even a few extra tablespoons can dry out the batter significantly. Measure by weight (120g) whenever possible. Cutting the brownies while still warm also causes crumbling, so let them cool completely before slicing.
Can I substitute oil for the butter?
You can use vegetable oil as a substitute. Because oil is 100% fat and butter contains water and milk solids, use slightly less oil than the butter called for. The texture will be a bit different, and you will lose some of the buttery flavor, but the brownies will still be moist and fudgy.
How do I know when fudgy brownies are done without overbaking them?
Insert a toothpick into the center at the 35-minute mark. For fudgy brownies, you want it to come out with a small smear of batter or several moist crumbs clinging to it. If it comes out completely clean, the brownies have already passed their fudgy window and are heading toward cakey territory.
Can I add nuts to this brownie baking recipe?
Absolutely. About half a cup of toasted walnuts or pecans folded in with the chocolate chips adds a pleasant crunch without overwhelming the chocolate. Toasting the nuts first in a dry skillet for 3 to 4 minutes deepens their flavor and keeps them from tasting raw against the rich batter.
How do I get that shiny, crackly top on my brownies?
The crackly top comes from vigorously whisking the sugar into the warm melted butter for a full 30 seconds before adding anything else. This starts dissolving the sugar crystals, which then rise to the surface of the batter during baking and form that glossy crust. Do not skip or rush this step.
Worth Making From Scratch
Box mixes have their place, but once you realize that a from-scratch brownie recipe takes the same amount of time and produces a noticeably richer, more satisfying result, it is hard to go back. The one-bowl method keeps cleanup minimal, and the bake time flexibility means you can dial in the exact texture you prefer.
Give this one a try the next time a chocolate craving hits. You might find yourself making it on a weeknight just because you can.
Essential Kitchen Tools
Making Brownie Recipe? Most failed attempts come from using the wrong pan or heat setup — not the recipe itself.
Beginner-Friendly Brownie Recipe
- Total Time: 45 minutes
- Yield: 16 brownies 1x
Ingredients
- 1 cup unsalted butter ((226g))
- 2 cups granulated sugar ((400g))
- ¾ cup unsweetened cocoa powder ((75g))
- 3 large eggs (room temperature)
- 1 tablespoon vanilla extract
- 1 teaspoon salt
- 1 cup all-purpose flour ((120g))
- 1½ cups semisweet chocolate chips ((270g))
Instructions
- Begin by preheating the oven to 350°F. Prepare an 8×8-inch baking pan by lightly greasing it with baking spray and lining it with parchment paper.
- In a large bowl suitable for the microwave, melt the butter in 20-second intervals, stirring in between until it is completely melted, which should take around 2 minutes. Incorporate the sugar and cocoa powder, whisking vigorously for 30 seconds to create the crackly top. Then, mix in the eggs, vanilla, and salt.
- Stir in the flour and chocolate chips using a spatula until just combined. Transfer the batter to the prepared pan, optionally sprinkling more chocolate chips on top if desired.
- Place in the oven and bake for approximately 35 to 40 minutes for fudgy brownies, or up to 55 minutes for a cakey texture. To check for doneness, insert a toothpick into the center; for fudgy brownies, it should come out with a bit of batter or some moist crumbs, while for cakey brownies, it should have only a few crumbs and be mostly clean. Allow the brownies to cool completely in the pan before slicing.
Notes
TECHNIQUE TIP: Stir the butter every 20 seconds while melting to avoid messes.
STORAGE: Store brownies in an airtight container at room temperature for up to 3 days.
SUBSTITUTION: Use dark chocolate chips for a richer flavor.
- Prep Time: 10 minutes
- Cook Time: 35 minutes
- Category: Dessert
- Method: Baked
- Cuisine: American
Nutrition
- Calories: 349 kcal
- Sugar: 31 g
- Sodium: 163 mg
- Fat: 20 g
- Saturated Fat: 12 g
- Unsaturated Fat: 6 g
- Trans Fat: 0.5 g
- Carbohydrates: 42 g
- Fiber: 3 g
- Protein: 4 g
- Cholesterol: 66 mg