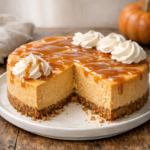
Why choose between the creamy elegance of a cheesecake and the spiced warmth of a pumpkin pie when you can have both? Combining these two holiday icons creates a dessert that is 100% more irresistible than either one alone. If you have ever struggled to pick a favorite, this recipe ends that delicious dilemma forever.
Imagine slicing through a buttery, golden graham cracker crust to reveal a velvety filling that tastes like autumn wrapped in cream cheese heaven. As it bakes, the intoxicating aroma of cinnamon and nutmeg will transform your kitchen into the ultimate cozy retreat. This is more than just a simple dessert; it is a seasonal celebration in every bite.
I developed this recipe after years of testing to ensure a showstopper that doesn’t crack or require a fussy water bath. The result is a surprisingly easy, make-ahead masterpiece that earns rave reviews every single time. Whether you are prepping for Thanksgiving or just craving something special, this creamy perfection will have everyone asking for seconds.
Ingredients for the Best Pumpkin Cheesecake
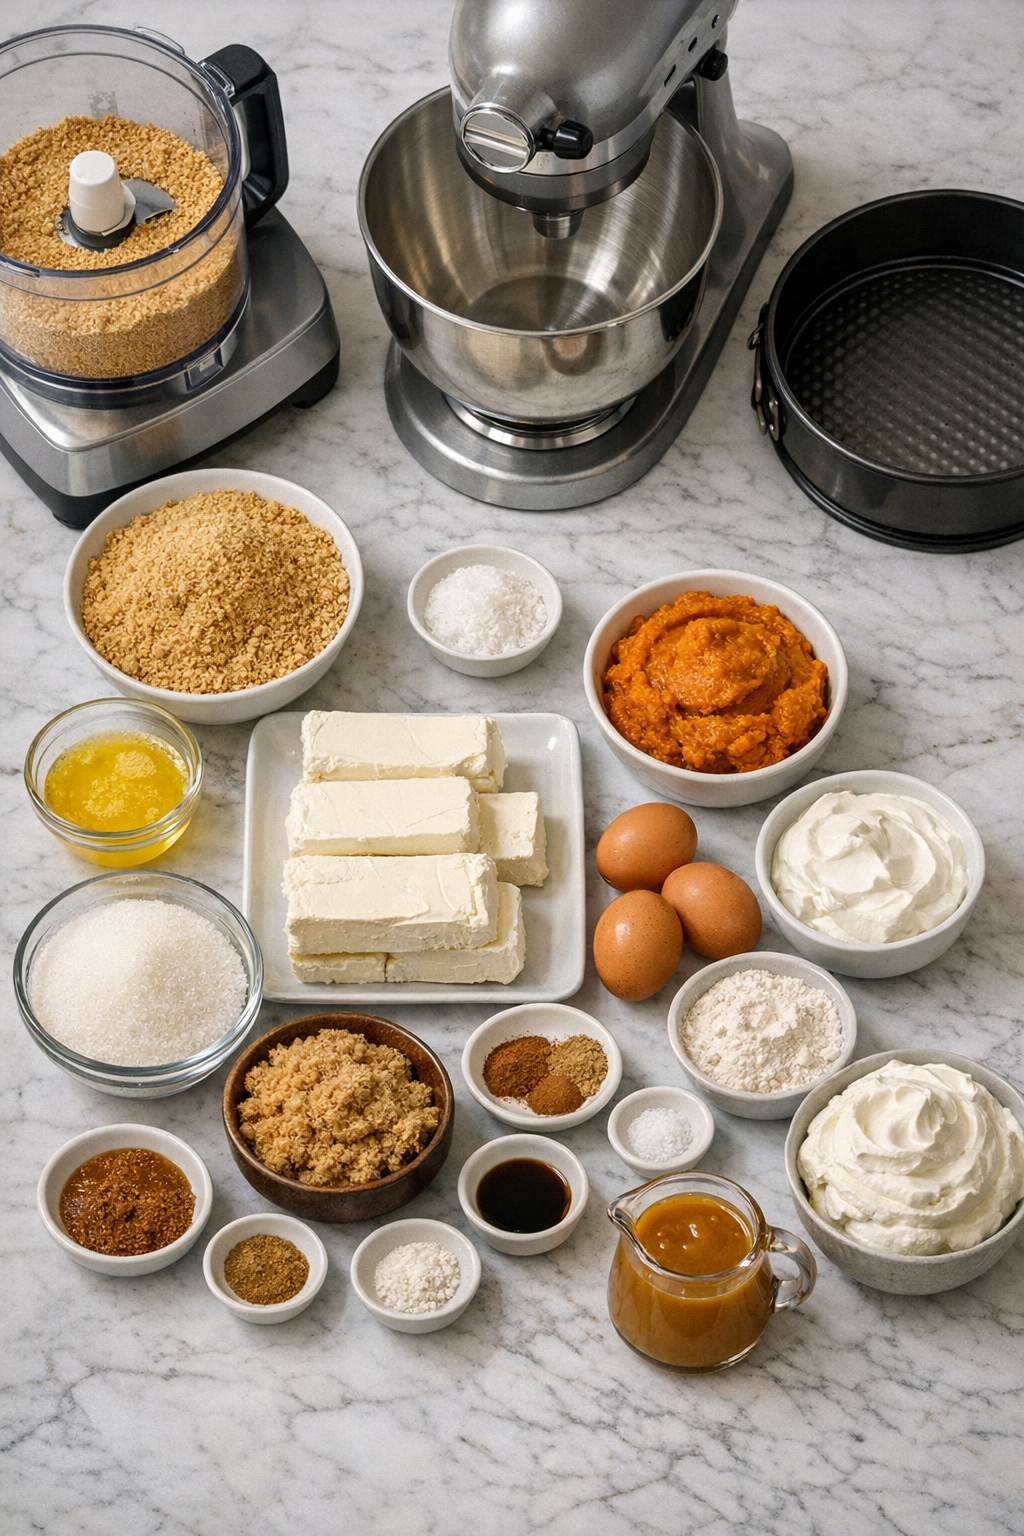
Gathering the right ingredients is the foundation of a perfect pumpkin cheesecake. This recipe uses simple, accessible ingredients that work together to create an incredibly smooth, flavorful dessert. Here’s everything you’ll need, organized by component:
The Graham Cracker Crust
- 1 1/2 cups graham cracker crumbs (from about 13 whole graham crackers): You can buy pre-ground crumbs, but freshly crushed crackers deliver better texture and flavor
- 6 tablespoons unsalted butter, melted: Unsalted gives you control over saltiness, though salted butter works in a pinch
- 1 tablespoon granulated sugar: Adds just a touch of sweetness to balance the buttery crust
- 1/2 teaspoon cinnamon: Enhances the fall flavor profile and complements the pumpkin filling beautifully
Pumpkin Cheesecake Filling
- 24 ounces cream cheese, room temperature: This is crucial for a smooth, lump-free filling; cold cream cheese won’t blend properly
- 1 cup packed light brown sugar: Provides deeper, molasses-rich sweetness that pairs perfectly with pumpkin; check for lumps before adding
- 15 ounces pumpkin puree: Use pure pumpkin puree (Libby’s is excellent), not pumpkin pie filling which contains added spices and sugar
- 4 large eggs: Brings structure and richness to the filling
- 1/4 cup sour cream: Adds tang and contributes to the ultra-creamy texture
- 2 tablespoons all-purpose flour: Helps stabilize the filling and prevent cracking
- 2 1/2 teaspoons pumpkin pie spice: The key to that warm, cozy flavor; you can substitute with a homemade blend of cinnamon, ginger, nutmeg, and cloves
- 1/4 teaspoon salt: Balances sweetness and enhances all the other flavors
- 1 tablespoon real vanilla extract: Choose pure vanilla for the best flavor
For Topping (Optional but Highly Recommended)
- Caramel sauce or butterscotch sauce: Adds a luxurious sweetness that complements the not-overly-sweet cheesecake
- Whipped cream: Made with heavy cream, sugar, and a splash of rum instead of vanilla for an elevated fall twist
- Extra pumpkin pie spice or cinnamon: For dusting the top and adding visual appeal
The beauty of this recipe lies in its simplicity. Furthermore, most of these ingredients are pantry staples, making this pumpkin cheesecake accessible for any home baker. Additionally, the quality of your pumpkin puree matters significantly; choose a brand with rich color and thick consistency for the best results.
Step-by-Step Instructions for Perfect Pumpkin Cheesecake
Making this pumpkin cheesecake is more straightforward than you might think. By following these detailed steps, you’ll achieve a smooth, crack-free dessert that looks as impressive as it tastes. Let’s break down the process into manageable stages.
Step 1: Prepare the Graham Cracker Crust
Start by preheating your oven to 350°F. To make the crust, place your graham crackers into a large zip-top bag and crush them with a rolling pin until you have fine, even crumbs.
Alternatively, pulse them in a food processor for about 30 seconds. You should end up with exactly 1 1/2 cups of crumbs. Transfer the crumbs to a bowl and stir in the sugar and cinnamon.
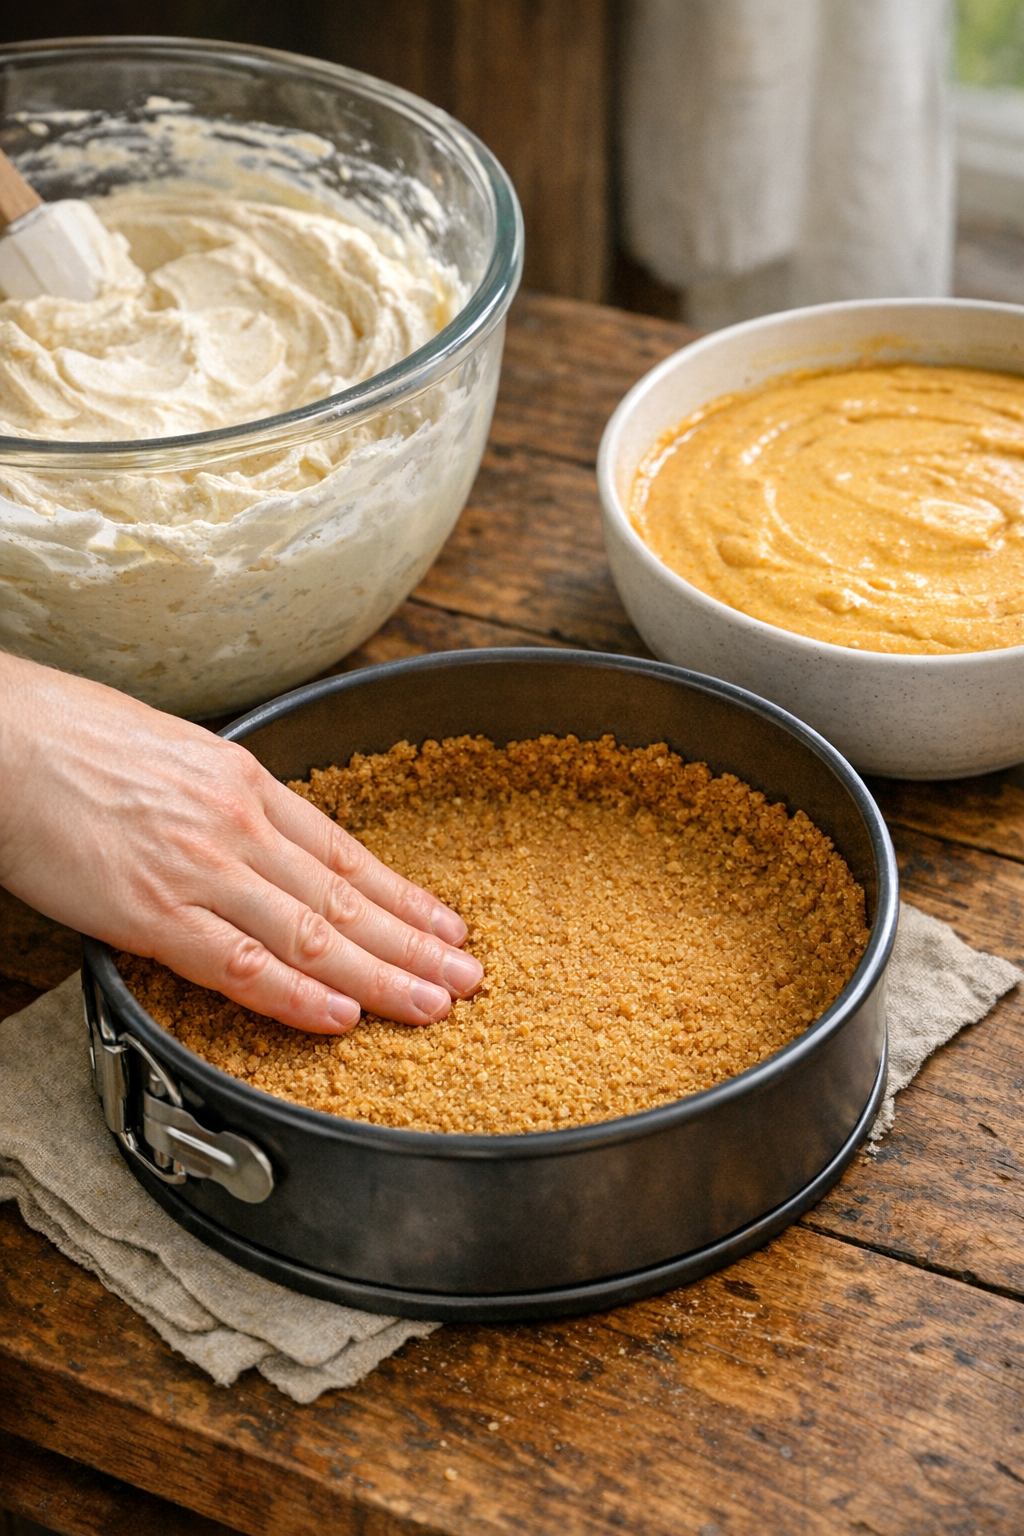
Next, pour in the melted butter and stir thoroughly until all the crumbs are evenly moistened. The mixture should hold together when pressed. Transfer this into a 9-inch springform pan with 3-inch tall walls. Using the back of a large spoon, press the crumbs firmly into the bottom of the pan, then push them about 1/2 inch up the sides to create a shallow wall. This step is important because it prevents filling from seeping underneath. Place the pan on a foil-lined baking sheet and pre-bake the crust at 350°F for 8 minutes. Once done, remove it from the oven and let it cool completely to room temperature while you reduce the oven temperature to 325°F.
Step 2: Beat the Cream Cheese and Sugar
While the crust cools, make sure your cream cheese is truly at room temperature; this typically takes about 2 hours out of the refrigerator. Cold cream cheese will create lumps that are nearly impossible to smooth out. In the bowl of a stand mixer fitted with the paddle attachment, combine the cream cheese and packed light brown sugar. Before adding the sugar, break it apart with your fingers to check for hard lumps, which won’t dissolve and can ruin your filling’s texture. Beat the mixture on medium speed for about 5 minutes, scraping down the bowl at least once. The mixture should become light, fluffy, and completely smooth without any cream cheese chunks. This step incorporates just enough air to create a creamy texture while avoiding the over-aeration that can cause cracking. Consequently, patience during this stage pays off with a silky, professional result.
Step 3: Combine the Pumpkin Mixture
In a separate large mixing bowl, whisk together the pumpkin puree, eggs, sour cream, flour, pumpkin pie spice, salt, and vanilla extract. Mix thoroughly until the mixture is smooth, thick, and creamy with no streaks of egg visible. The flour helps stabilize the cheesecake and gives it structure, while the sour cream adds tanginess and richness. Once this pumpkin mixture is well combined, add it to the bowl with the beaten cream cheese mixture. Switch your mixer to low speed and continue mixing just until everything is well incorporated, scraping down the bowl once or twice. It’s critical to keep the mixer on low speed at this stage because too much air incorporation can lead to cracks during baking. The final filling should be thick, smooth, and beautifully spiced with a gorgeous orange color.
Step 4: Assemble and Bake the Cheesecake
Pour the pumpkin cheesecake filling into your pre-baked and cooled graham cracker crust, using a spatula to scrape every last bit from the bowl. Smooth the top gently with your spatula.
Now, here’s a crucial step: tap the filled pan firmly on your counter about 15 times to release any trapped air bubbles, which can create unsightly holes in your finished cheesecake.
You’ll see small bubbles rise to the surface and pop. Place a loaf pan half-filled with hot water on the center oven rack; this creates steam that helps prevent cracks without the hassle of a traditional water bath. Place your cheesecake pan next to it on the same rack. Bake at 325°F for 50 to 60 minutes.
The cheesecake is done when the edges are set and puffed slightly, but the center 3 inches still have a gentle wobble when you jolt the pan. It should jiggle like firm Jell-O, not liquid. Avoid overbaking, as this is the primary cause of cracks and dry texture.
Step 5: Cool the Cheesecake Properly
Proper cooling is essential for preventing cracks. When the baking time is complete, turn off the oven and prop the door open with a wooden spoon.
Let the cheesecake cool slowly in the oven for 30 minutes. This gradual temperature change prevents the sudden contraction that causes cracks. If you have a gas oven, which cools much faster, simply turn off the oven and leave the door closed instead.
After 30 minutes, remove the cheesecake from the oven and immediately run a thin knife around the edge of the pan to release any tension between the filling and the pan sides. This simple step significantly reduces the chance of cracking.
Place the cheesecake on a wire cooling rack and let it cool completely to room temperature, which takes about 2 hours.
Once cooled, cover the pan tightly with plastic wrap and refrigerate for at least 4 hours, though overnight is even better. This chilling time allows the flavors to develop fully and the texture to set to creamy perfection.
Step 6: Remove from Pan and Serve
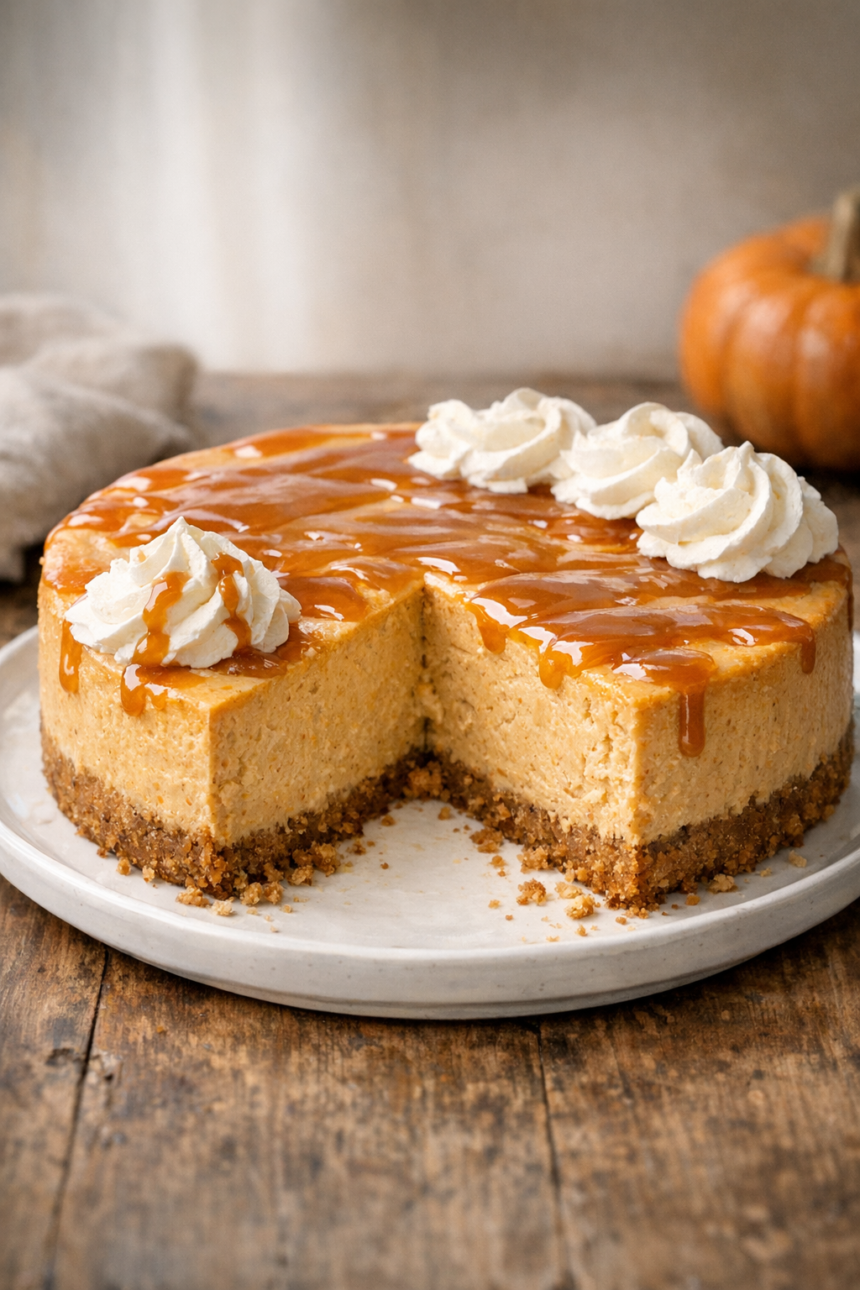
When you’re ready to serve, carefully release the springform pan clasp and remove the outer ring. The buttery crust should release easily thanks to the knife you ran around the edge earlier. If desired, carefully slide the cheesecake off the springform base onto a serving plate using a large, flat spatula. Alternatively, you can serve it directly from the base, which is perfectly acceptable and often easier. To cut clean slices, use a sharp knife dipped in hot water and wiped clean between each cut. This technique ensures each slice looks pristine and professional. Top each slice with a drizzle of caramel or butterscotch sauce, a generous dollop of whipped cream, and a light dusting of pumpkin pie spice or cinnamon. The toppings add just the right amount of extra sweetness and visual appeal, transforming your pumpkin cheesecake into a true showstopper.
Healthier Alternatives for Pumpkin Cheesecake
While this pumpkin cheesecake is worth every indulgent calorie, there are ways to lighten it without losing flavor or texture. These substitutions are helpful if you have guests with dietary preferences or want a slightly less decadent version.
- Reduced-fat cream cheese: Replace full-fat cream cheese with Neufchâtel or reduced-fat cream cheese. Avoid fat-free versions, which have poor texture. This cuts about 20% of the fat while keeping decent creaminess.
- Greek yogurt swap: Substitute half of the sour cream with plain, full-fat Greek yogurt. It adds protein and a tangy flavor that enhances the cheesecake.
- Natural sweeteners: Replace half the brown sugar with coconut sugar or use a 1:1 baking sugar substitute. This may slightly affect texture and browning.
- Whole wheat graham crackers: Use whole wheat graham crackers for the crust. They add fiber and nutrients without changing the taste much.
- Reduce the crust: Use only 1 cup of graham cracker crumbs and 4 tablespoons of butter. This creates a thinner crust and cuts calories while keeping textural contrast.
- Homemade pumpkin puree: Fresh sugar pumpkins often have stronger flavor and fewer additives than canned versions. Making your own puree enhances taste.
- Skip the toppings: The cheesecake is delicious on its own. Skipping caramel sauce and whipped cream saves 100–150 calories per slice.
Remember, these modifications may slightly change texture and taste. It’s best to try the original recipe first. Still, these healthier alternatives make the dessert more suitable for regular enjoyment.
Creative Serving Suggestions for Pumpkin Cheesecake
This cheesecake is stunning on its own, but the right presentation can make it unforgettable. Here are some ideas to impress your guests:
- Classic caramel drizzle: Warm homemade caramel sauce adds luxurious sweetness and contrasts beautifully with the orange filling.
- Rum-spiked whipped cream: Use 1 tablespoon of rum instead of vanilla in whipped cream. It creates a sophisticated adult twist that pairs with fall spices.
- Candied pecans or walnuts: Sprinkle chopped candied nuts on top for crunch and extra autumnal flavor.
- Gingersnap crust variation: Swap half the graham crackers with gingersnap cookies. This adds spice and complexity to the crust.
- Mini cheesecakes: Divide the recipe into 12 muffin tins with liners for individual servings. Great for parties and portion control.
- Chocolate ganache: Drizzle dark chocolate ganache for extra decadence.
- Fresh berries: Raspberries or cranberries add tartness that balances richness.
- Spiced whipped cream: Add 1/2 teaspoon pumpkin pie spice to whipped cream for cohesive flavor.
- Coffee pairing: Serve with spiced coffee, chai lattes, or pumpkin spice lattes.
- Ice cream accompaniment: A small scoop of vanilla bean or cinnamon ice cream creates a delightful hot-and-cold contrast.
For holiday gatherings, present the cheesecake on a cake stand with small pumpkins, fall leaves, or cinnamon sticks. This doubles as a stunning centerpiece.
The Science Behind the Perfect Pumpkin Slice
Even experienced bakers can face issues with cheesecake. Understanding common pitfalls helps you make perfect pumpkin cheesecake every time:
- Cold cream cheese: Lumpy filling often comes from cold cream cheese. Bring it to room temperature for at least 2 hours or microwave in 10-second bursts at 30% power.
- Overmixing the filling: Too much air, especially after adding eggs, creates bubbles that expand and cause cracks. Mix on low speed once eggs are added.
- Overbaking: Remove the cheesecake when the center still jiggles. Overbaking makes it dry and cracked.
- Skipping the tap test: Tap the pan on the counter to release air bubbles. Otherwise, holes and uneven texture can occur.
- Using pumpkin pie filling: Pie filling has added sugar and spices. Always use pure pumpkin puree for balanced flavor.
- Not checking brown sugar for lumps: Hard lumps won’t dissolve, creating grainy spots.
- Rapid temperature changes: Avoid moving the cheesecake from a hot oven to a cold fridge. Cool gradually at room temperature first.
- Cutting warm cheesecake: Wait until fully chilled. Cutting too early creates messy, unstable slices.
- Springform pan gaps: Ensure the pan closes tightly. Wrap with foil if using a water bath to prevent leaks.
- Not running a knife around the edge: After baking, run a knife around the pan edge. Cheesecake shrinks as it cools and could crack if stuck to the pan.
Avoiding these mistakes ensures crack-free, creamy cheesecake. Understanding the science also helps troubleshoot problems.
Storing and Make-Ahead Tips for Pumpkin Cheesecake
Pumpkin cheesecake tastes better the next day, making it ideal for holiday planning. Here’s how to store and prepare it ahead:
Refrigerator Storage
- Shelf life: Stays fresh 5–7 days.
- Best method: Cover tightly with plastic wrap, pressing the wrap onto the surface. Alternatively, use an airtight container.
- Odor protection: Avoid storing near strong-smelling foods. Cheesecake absorbs odors easily.
- Individual slices: Wrap each slice in plastic and store in airtight containers. Keeps 5 days.
Freezer Storage
- Whole cheesecake: Freeze unwrapped for 2 hours until solid. Wrap tightly in plastic then foil. Keeps up to 3 months.
- Individual slices: Freeze slices on a baking sheet until solid. Wrap individually and store in freezer bags for up to 3 months.
- Thawing: Move frozen cheesecake to the fridge overnight. Do not thaw at room temperature to avoid soggy texture.
- Toppings: Add whipped cream, caramel, or other toppings after thawing.
Make-Ahead Timeline
- 3 days ahead: Bake and refrigerate. Flavors meld over a few days.
- 1 week ahead: Bake and freeze, then thaw 24 hours before serving.
- Day before serving: Prepare toppings separately for last-minute assembly.
- Day of serving: Remove from fridge 20–30 minutes before serving for optimal flavor and texture.
These strategies turn pumpkin cheesecake into a stress-free, make-ahead dessert.
Pro Tips
- Cream cheese to pumpkin ratio: Use 24 oz cream cheese to 15 oz pumpkin. Too much pumpkin makes the cheesecake loose; too little makes it taste plain.
- Brown sugar: Adds depth and subtle molasses notes. Works well with 2 1/2 tsp pumpkin pie spice.
- No water bath required: A pan of hot water on the same rack creates steam to prevent cracks. Slow cooling prevents rapid temperature changes.
- Flour: 2 tablespoons provides structure without making it dense.
- Sour cream: Adds tang and ultra-smooth texture.
These factors together make a foolproof, make-ahead-friendly cheesecake suitable for beginners and pros alike.
Conclusion
This pumpkin cheesecake combines creamy richness and spiced comfort. Its buttery crust, perfectly spiced filling, and stunning presentation make it a fall favorite.
It’s approachable for home bakers, needs no water bath, and can be made ahead. Top with caramel and rum-spiked whipped cream or serve simple—it’s always delicious.
Make-ahead convenience, reliable results, and show-stopping presentation make it perfect for Thanksgiving, Christmas, or any autumn gathering. Try it anytime; the flavors are too good to wait for a special occasion.
Frequently Asked Questions About Pumpkin Cheesecake
Can I use pumpkin pie filling instead of puree?
No. Pie filling has added sugar and spices that disrupt the recipe’s balance. Use 100% pure pumpkin. Libby’s is a reliable brand.
Why did my pumpkin cheesecake crack?
Cracks result from overbaking, rapid temperature changes, or too much air. Remove when the center wobbles, cool gradually, run a knife around edges, and avoid overmixing. Hot water in the oven helps prevent cracking.
Do I need a water bath?
No. A loaf pan filled halfway with hot water on the same oven rack creates enough steam to prevent cracks.
How do I know when it’s done baking?
Edges should be set and slightly puffed. Center 3 inches should wobble gently. Internal temperature: ~150°F. Slight underbaking is better than overbaking.
Can I make pumpkin cheesecake ahead of time?
Yes! Refrigerated or frozen, it keeps well, and flavors improve over time.
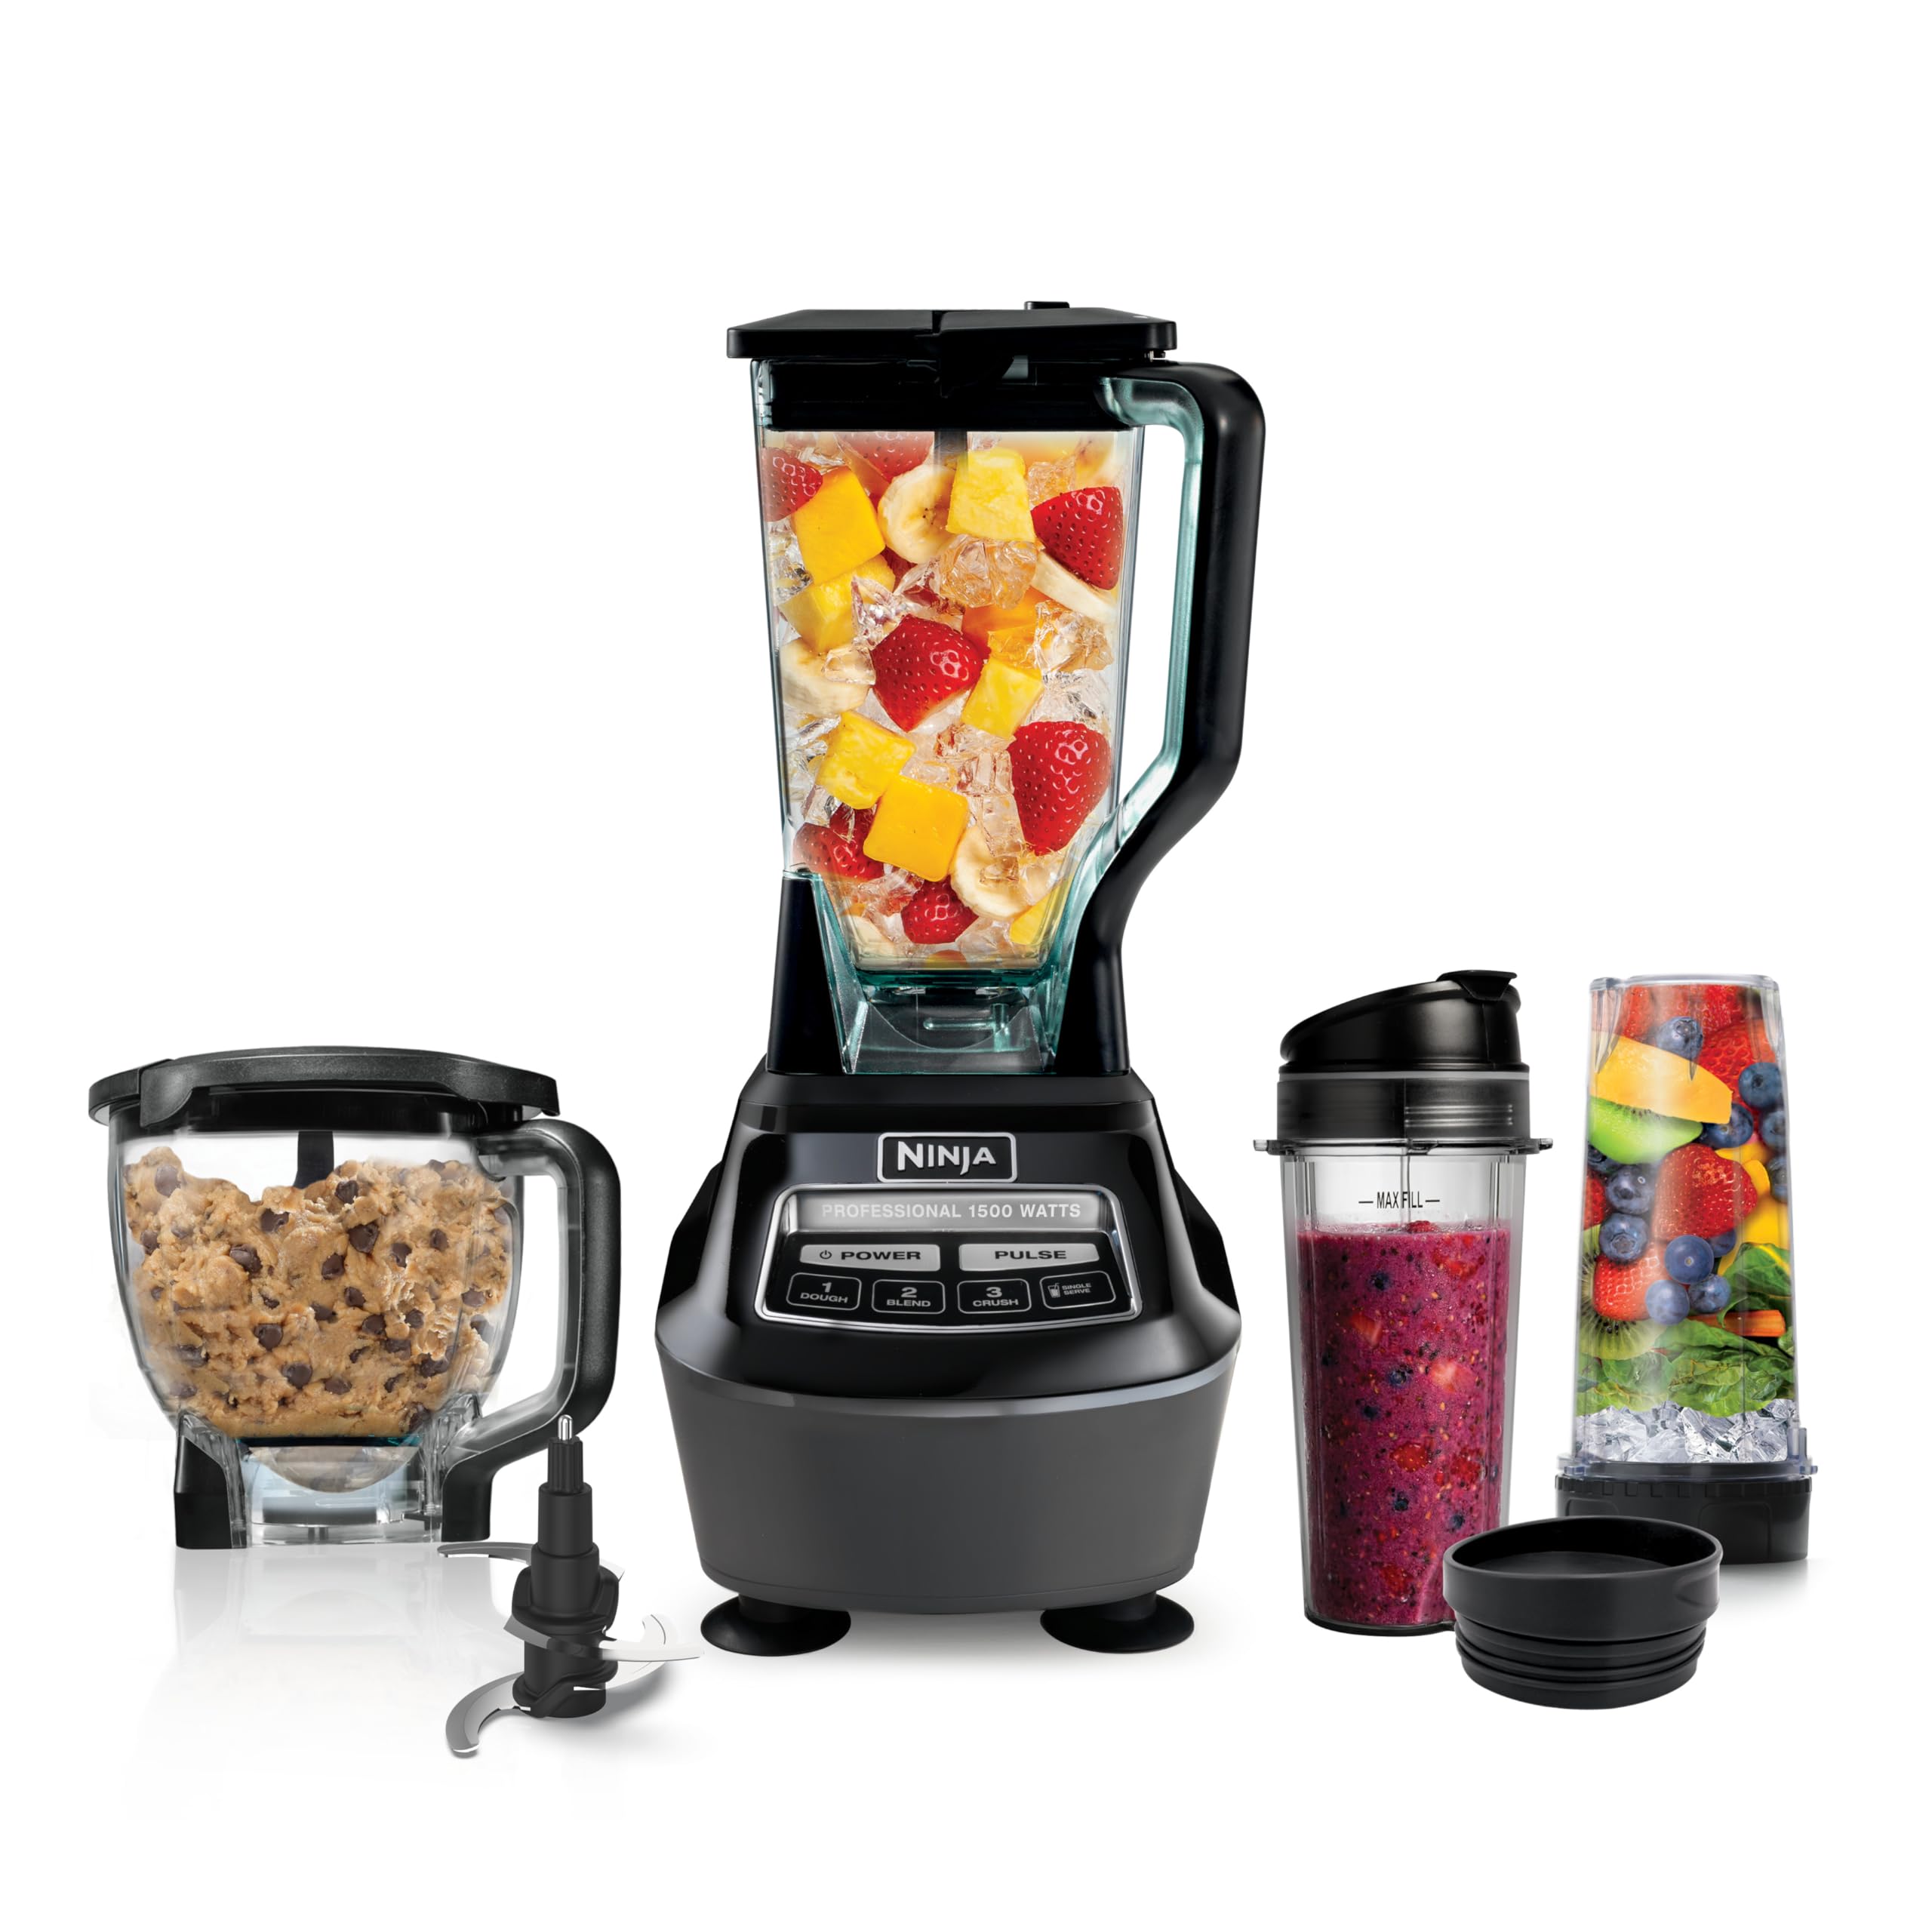
Tools You’ll Need
Essential Kitchen Tools
Everything you need to make cooking easier and more enjoyable


Must Try Recipes
- Pumpkin Chocolate Chip Muffins
Soft pumpkin muffins studded with rich chocolate chips. - Chocolate Cheesecake
Decadent chocolate lover’s cheesecake with a silky, rich filling. - Berry Cheesecake
Creamy cheesecake topped with fresh berries and fruity sauce. - No Bake Mini Cheesecakes
Easy no-bake mini cheesecakes perfect for quick treats. - Cheesecake Fluff
Light, airy cheesecake-flavored dessert ideal for dipping and layering.

Want to save this recipe?
Want to save this recipe? Enter your email below, and we'll send it straight to your inbox. Plus, receive new recipes every week!
Creamy Pumpkin Cheesecake
- Total Time: 1 hour 30 minutes
Description
A failproof cheesecake with rich pumpkin spice filling and crisp graham crust that stays crack-free every time.
Ingredients
- 1½ cups graham cracker crumbs (about 13 crackers)
- 6 Tbsp unsalted butter, melted
- 1 Tbsp granulated sugar
- ½ tsp ground cinnamon
- 24 oz cream cheese, room temperature
- 1½ cups packed light brown sugar
- 15 oz pumpkin purée, well drained
- 4 large eggs
- ¼ cup sour cream
- 2 Tbsp all-purpose flour
- 2½ tsp pumpkin pie spice
- ¼ tsp salt
- 1 Tbsp vanilla extract
- Butterscotch sauce or caramel, for serving
- Whipped cream, for topping
Instructions
- Preheat oven to 350°F. Pulse graham crackers in a food processor until finely ground.
- In a mixing bowl, combine crumbs, sugar, cinnamon, and melted butter. Press into a 9-inch springform pan and bake 8 minutes. Cool.
- Reduce oven to 325°F. Beat cream cheese and brown sugar in a stand mixer until smooth and fluffy, about 5 minutes.
- Whisk pumpkin puree, eggs, sour cream, flour, pie spice, salt, and vanilla. Add to cream cheese and mix until combined.
- Pour filling into crust, tap pan to release air. Place a loaf pan half-filled with hot water beneath on the rack.
- Bake 50–60 minutes until edges are set but center slightly wobbles. Turn off oven and cool with door ajar for 30 minutes.
- Run a knife around pan edge, cool to room temperature (2 hours), then wrap and refrigerate at least 4 hours or overnight.
- Remove from pan, slice, and serve with sauce and whipped cream.
- Prep Time: 30 minutes
- Cook Time: 60 minutes
- Category: Desserts
- Cuisine: American
Nutrition
- Serving Size: 12 slices
- Calories: 450 kcal
- Sugar: 34 g
- Sodium: 331 mg
- Fat: 28 g
- Saturated Fat: 16 g
- Unsaturated Fat: 9 g
- Trans Fat: 0.2 g
- Carbohydrates: 44 g
- Fiber: 2 g
- Protein: 7 g
- Cholesterol: 129 mg