
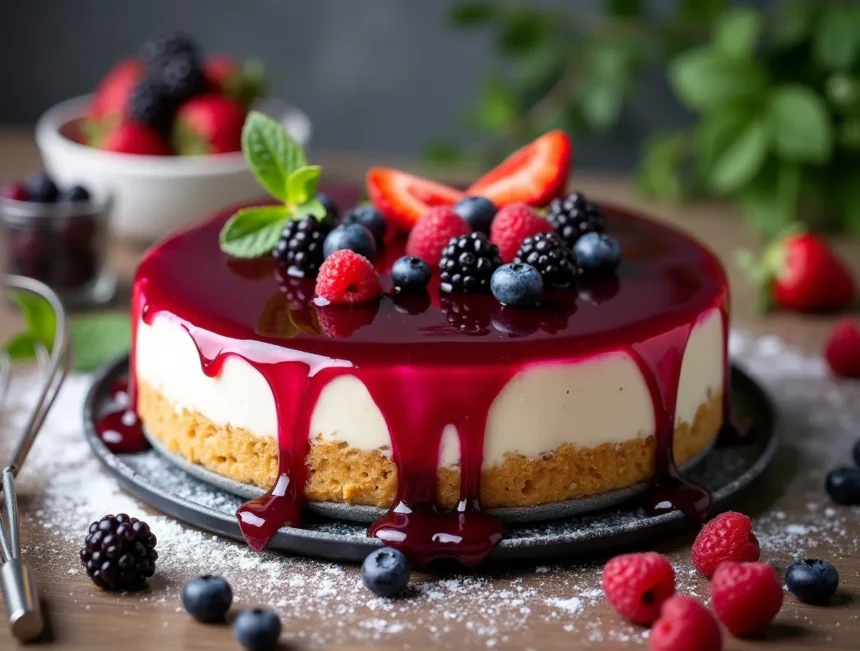
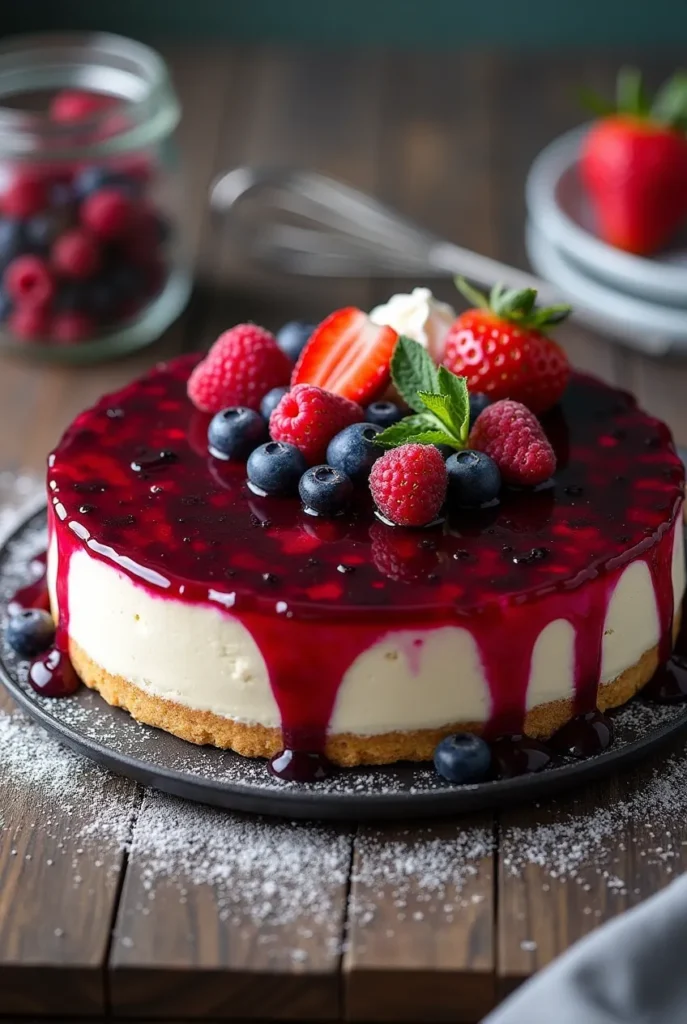
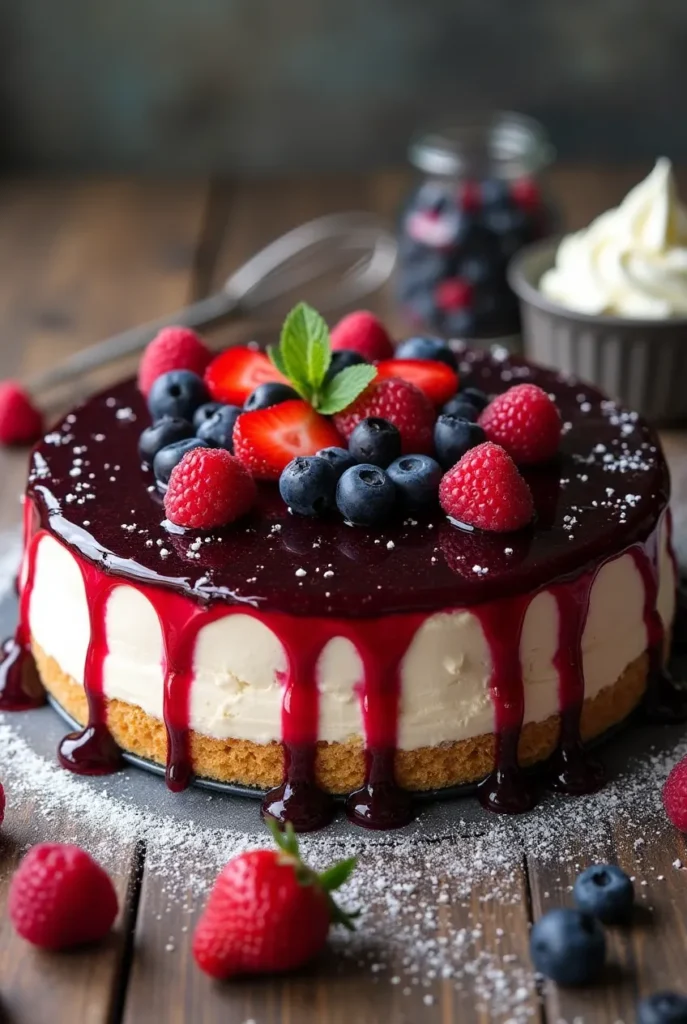
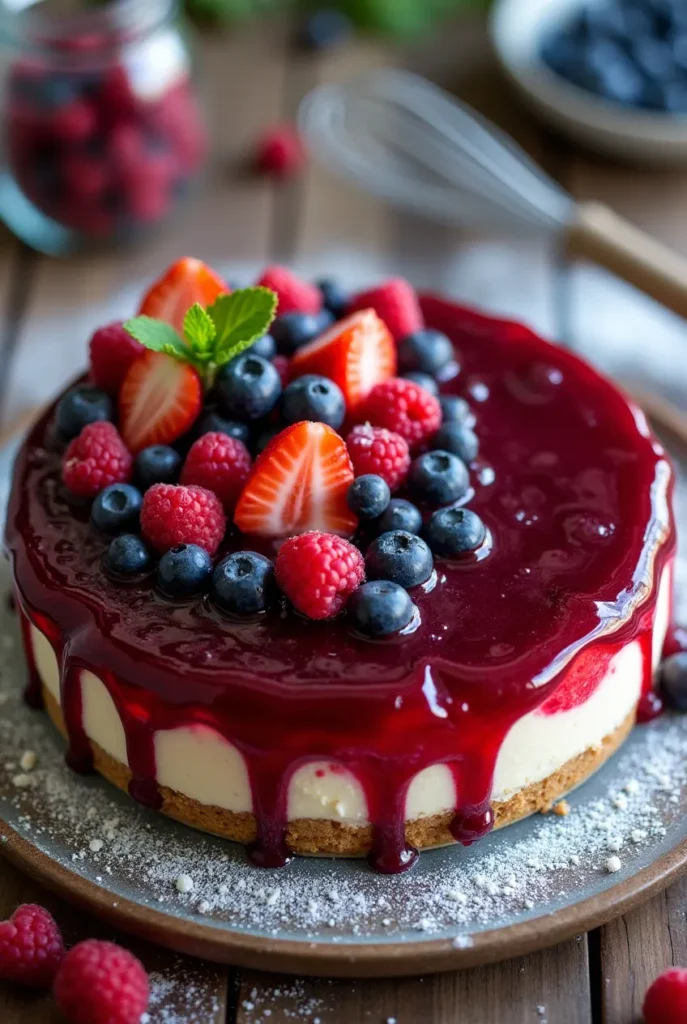
Imagine slicing into a silky-smooth cheesecake topped with a vibrant berry layer that practically melts in your mouth all without ever turning on your oven! This no-bake berry cheesecake delivers the perfect balance of creamy, tangy, and sweet flavors that will have everyone asking for seconds. The magic of this recipe lies in how deceptively simple it is to create such an impressive dessert with minimal effort. Fresh berries provide not only stunning color but also essential antioxidants and vitamins. The contrast between the buttery biscuit base, velvety cream cheese filling, and that stunning berry topping creates a dessert that looks like it came from a high-end bakery.
Unlike our popular lemon tart recipe that requires careful baking, this no-bake wonder gives you all the luxury without the worry of cracks or overbaking. Whether you’re preparing for a special occasion or simply craving something delicious, this antioxidant-rich berry cheesecake is about to become your new go-to dessert! The health benefits of berries make this treat not just delicious but also nutritionally valuable.
What Is Berry Cheesecake?
Have you ever wondered why this heavenly creation is called a “cheesecake” when it doesn’t quite resemble either cheese or cake? This delightful contradiction has been pleasing palates for centuries, with the earliest known cheesecake dating back to ancient Greece! Our berry version takes the classic no-bake cheesecake and crowns it with a stunning berry topping that adds both visual appeal and a burst of fruity flavor. Berries contribute natural sweetness while providing impressive health benefits. As they say, “the way to a man’s heart is through his stomach,” and I’ve yet to meet anyone who can resist the charm of this berry-topped beauty. Why not bring a little sweetness to your day and give this recipe a try?
Why You’ll Love This Berry Cheesecake
Main Highlight
This no-bake berry cheesecake delivers pure luxury without the fuss of traditional baking. The luscious cream cheese filling has just the right balance of sweetness and tanginess from fresh lemon, while the berry topping creates a stunning jewel-toned finish that makes this dessert as beautiful as it is delicious. Berries offer tremendous health benefits, including antioxidants that fight free radicals in the body. The contrast between the crunchy biscuit base, silky filling, and fruit topping creates a perfect harmony of textures in every bite.
Cost-Saving Benefits
Making this cheesecake at home will save you a small fortune compared to bakery prices! A similar-sized berry cheesecake from a specialty bakery could easily cost $40-50, but this homemade version comes in at a fraction of that price. You likely have many of the ingredients already in your pantry, making this an economical way to create an impressive dessert that serves 12 generous portions. Additionally, incorporating nutrient-dense berries into your diet through delicious desserts provides excellent value for your health. The health benefits of berries can be enjoyed without breaking the bank.
Flavorful Ingredients
The secret to this cheesecake’s unforgettable flavor lies in the combination of fresh lemon zest and juice in the filling, which perfectly complements the sweet berry topping. Whether you use canned berries in syrup for convenience or make the topping from scratch with fresh seasonal berries, the result is a dessert that tastes like summer in every bite. Nutritionists often recommend berries as one of the most beneficial fruits for overall health. Unlike our chocolate mousse cake which relies on cocoa for depth, this cheesecake showcases the bright, natural flavors of berries and citrus.
Ready to create this showstopping dessert? Let’s dive into how simple it is to make!
How to Make Berry Cheesecake
Quick Overview
This no-bake berry cheesecake comes together in just 25 minutes of prep time, then sets in the refrigerator while you get on with your day. Waiting for it to chill becomes the most challenging part! The filling achieves its perfect consistency without any baking, relying instead on whipped cream and optional gelatin for structure. As a result, you’ll enjoy a lighter, creamier texture than baked versions, making this the perfect refreshing dessert for any occasion. The health benefits of berries shine through in both flavor and visual appeal in this simple yet impressive dessert.
Key Ingredients for Berry Cheesecake
Base Layer:
- 250g (9oz) digestive biscuits or graham crackers – These create the perfect crunchy foundation
- 113g (1 stick) butter, melted – Binds the crumbs together for a sturdy base
Creamy Filling:
- 500ml (2 cups) cream (heavy/whipping cream, about 30% fat) – Creates the airy, mousse-like texture
- 225g (8oz) cream cheese, room temperature – Provides the signature tangy cheesecake flavor
- 85g (⅔ cup) powdered sugar – Sweetens without graininess
- Zest and juice from 1 medium lemon – Adds brightness and depth of flavor
- 3 tsp gelatin powder + 2 tbsp boiling water (optional) – Helps set the filling if not freezing
Berry Topping:
- 1 can berries in syrup – Provides both flavor and color for the topping, plus antioxidant benefits
- 3 tsp gelatin powder + 2 tbsp boiling water – Sets the berry layer
Possible Substitutions:
- Chocolate biscuits/cookies instead of digestives for a chocolate twist
- Fresh or frozen berries blended with simple syrup instead of canned berries for maximum health benefits
- Agar-agar as a vegetarian alternative to gelatin (use according to package instructions)
- Lime instead of lemon for a different citrus note
Detailed Step-by-Step Instructions
Preparing the Base
- Create biscuit crumbs: Place 250g digestive biscuits or graham crackers into a food processor and pulse until you have fine crumbs. For those without a food processor, place the biscuits in a sealed plastic bag and crush them with a rolling pin or heavy object.
- Combine with butter: Melt 113g butter and allow it to cool slightly. Pour the melted butter over the biscuit crumbs and mix thoroughly with a wooden spoon until the mixture resembles wet sand.
- Form the base: Line a springform cake tin with parchment paper (this makes removal much easier later). Pour the biscuit mixture into the tin and use the back of a spoon to firmly press it down, creating an even layer. Don’t worry about making it perfectly smooth, a slightly rustic look adds to the charm of the finished cheesecake.
- Chill the base: Place the cake tin in the refrigerator to set while you prepare the filling.
Creating the Creamy Filling
- Whip the cream: Pour 500ml of cold cream (straight from the refrigerator) into a large mixing bowl. Using a whisk or hand mixer, beat the cream until it forms soft peaks. This should take 3-4 minutes by hand or 1-2 minutes with an electric mixer. Be careful not to over-whip, you want it to hold its shape but still be smooth, not grainy.
- Prepare the cream cheese mixture: In a separate larger bowl, combine 225g room temperature cream cheese with 85g (⅔ cup) powdered sugar. Beat with a whisk or wooden spoon until completely smooth and free of lumps.
- Add citrus flavor: Zest one medium lemon, using only the yellow part (avoid the bitter white pith). Cut the lemon in half and squeeze the juice into the cream cheese mixture, catching any seeds with your hand. Mix the zest and juice thoroughly into the cream cheese mixture.
- Add gelatin (if using): If you’re planning to serve the cheesecake from the refrigerator rather than partially frozen, dissolve 3 teaspoons of gelatin powder in 2 tablespoons of boiling water. Stir until fully dissolved, then immediately add to the cream cheese mixture and whisk to combine.
- Combine the mixtures: Add the whipped cream to the cream cheese mixture and gently fold everything together using a spatula. Work slowly and carefully to maintain the air in the whipped cream, folding until just combined and no streaks remain.
- Fill the cake tin: Remove the chilled base from the refrigerator and pour the cheesecake filling over it. Use an offset spatula or the back of a spoon to smooth the top. Return the cheesecake to the refrigerator for a few hours to set before adding the topping.
Creating the Berry Topping
- Prepare the berry topping: Pour a can of berries in syrup into a blender and blend until smooth. For those using fresh or frozen berries instead, blend them and add simple syrup (equal parts water and sugar, simmered until dissolved) to taste. Fresh berries will maximize the health benefits of this dessert, providing more vitamins and antioxidants than canned alternatives.
- Strain the berry mixture: Pour the blended berries through a fine sieve to remove any seeds, collecting the smooth puree in a bowl beneath.
- Set the topping: Dissolve 3 teaspoons of gelatin powder in 2 tablespoons of boiling water. Add this to the strained berry mixture and stir until well combined.
- Complete the cheesecake: Pour the berry mixture over the set cheesecake filling and return to the refrigerator. Allow the cheesecake to set completely for at least 4 hours, preferably overnight.
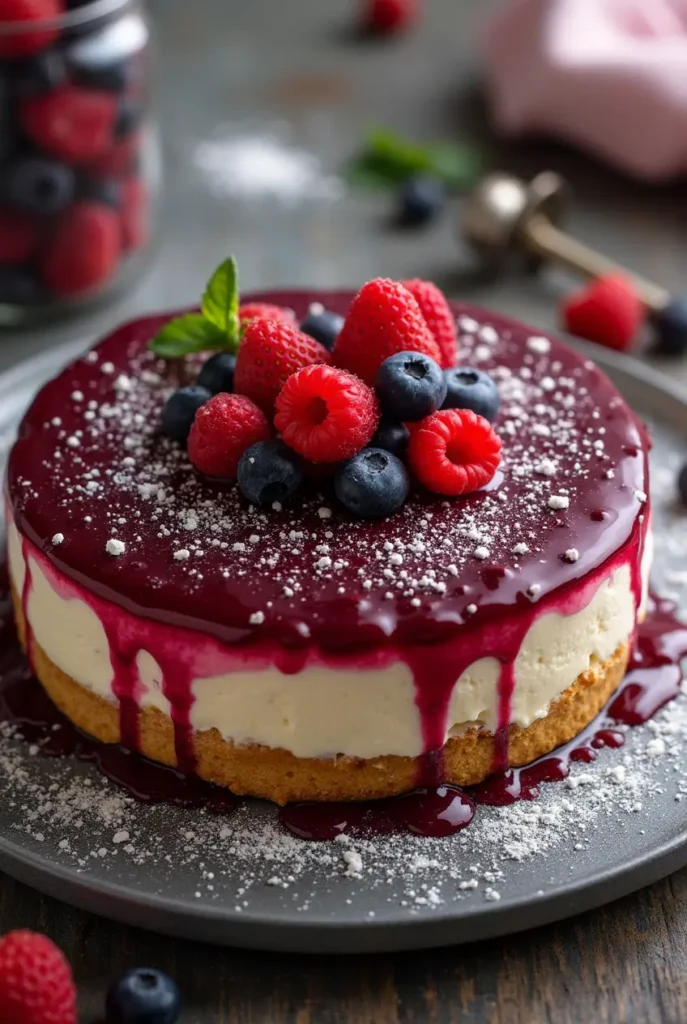
- Serve and enjoy: When ready to serve, carefully remove the cheesecake from the tin. If desired, top with fresh berries and a dollop of whipped cream for an extra special presentation and additional antioxidant power. The health benefits of berries are maximized when eaten fresh, so adding some to the top just before serving enhances both visual appeal and nutritional value.
What to Serve Berry Cheesecake With
This spectacular berry cheesecake stands beautifully on its own, but for an extra-special presentation, consider these complementary additions:
- A dollop of freshly whipped cream to add another layer of creaminess
- A handful of mixed fresh berries scattered over the top for texture, visual appeal, and added health benefits
- A light dusting of powdered sugar for an elegant finish
- A scoop of vanilla ice cream on the side for a temperature contrast
- A drizzle of white chocolate sauce for added decadence
- A sprig of fresh mint for color and a refreshing aromatic note
For a complete dessert spread, this berry-rich cheesecake pairs wonderfully with:
- A selection of berry-infused teas or a strong coffee
- Champagne or Prosecco for celebrations
- A dessert wine like Moscato or a ruby port
Top Tips for Perfecting Berry Cheesecake
Getting the Texture Just Right
- Ensure your cream cheese is at room temperature before mixing to avoid lumps in your filling
- Whip the cream until it holds soft peaks, not too stiff and not too loose
- Fold the whipped cream into the cream cheese mixture gently to maintain as much air as possible
- For the perfect cut, dip your knife in hot water and wipe clean between slices
Flavor Enhancements
- Try using half regular digestives and half chocolate biscuits for an interesting base variation
- Add a teaspoon of vanilla extract to the filling for extra depth of flavor
- Experiment with different berry combinations, blackberries and raspberries create a particularly vibrant color and offer different antioxidant profiles
- For a boozy adult version, add a tablespoon of crème de cassis or raspberry liqueur to the berry topping
Maximizing Berry Benefits
- Consider using fresh seasonal berries when possible for maximum nutritional value
- Mix different types of berries (blueberries, strawberries, raspberries) to create a varied nutritional profile
- If using frozen berries, choose ones without added sugar to control sweetness and preserve health benefits
- Remember that deeper-colored berries typically contain higher levels of beneficial antioxidants
- The health benefits of berries are most potent when they’re minimally processed, so fresh berries will provide the most nutritional advantages
Troubleshooting Common Issues
- If your filling isn’t setting properly, the most likely culprit is under-whipped cream or gelatin that wasn’t fully dissolved
- To prevent a soggy base, make sure the melted butter is thoroughly mixed with the crumbs before pressing into the tin
- If your berry layer bleeds into the cheesecake layer, ensure your filling is completely set before adding the topping
- For clean slices without smearing the berry layer, freeze the cheesecake briefly (15-20 minutes) before cutting
Storing and Reheating Tips
Refrigeration
This berry cheesecake will keep beautifully in the refrigerator for up to 5 days. Store it in an airtight container or cover tightly with plastic wrap to prevent it from absorbing other flavors from the fridge. The texture is best within the first 2-3 days when the contrast between the crunchy base and creamy filling is most pronounced. Cold storage helps preserve the beneficial compounds in the berries, maintaining their health benefits longer.
Freezing Options
For longer storage, this antioxidant-rich cheesecake freezes exceptionally well:
- Freeze the whole cheesecake or individual slices on a baking sheet until solid
- Wrap tightly in plastic wrap and then aluminum foil, or place in freezer-safe containers
- Label with the date and freeze for up to 3 months
- To serve from frozen, remove the cheesecake from the freezer and thaw in the refrigerator overnight, or let individual slices stand at room temperature for 20-30 minutes before serving
Serving from Frozen
A partially frozen cheesecake has a delightful ice-cream-like quality that’s perfect for summer days. For this serving style, remove the cheesecake from the freezer about 20-30 minutes before serving to soften slightly while still maintaining structure. The berry layer will maintain its vibrant color and nutritional properties even after freezing, ensuring you still get the health benefits of berries in each delicious bite.
Frequently Asked Questions About Berry Cheesecake
Can I make this cheesecake without gelatin?
Absolutely! There are several ways to make this cheesecake without gelatin:
- Freeze method: Simply freeze the cheesecake to set it firmly, then thaw slightly before serving.
- Vegetarian alternative: Substitute the gelatin with an equal amount of agar-agar powder.
- Increase cream cheese: For a firmer consistency without additives, increase the cream cheese by about 25% and reduce the cream slightly.
The health benefits of berries remain intact with any of these methods, so choose whichever works best for your dietary preferences.
What berries work best for this cheesecake?
You can use virtually any berry or combination of berries! Strawberries, Blueberries, Raspberries, Blackberries, and mixed berry blends all work wonderfully. Each berry type offers different health benefits: blueberries are known for their high antioxidant content, strawberries provide excellent vitamin C, and blackberries offer fiber and vitamin K. Choose seasonal berries for the best flavor and nutritional profile.
Can I make this cheesecake ahead of time for a party?
This cheesecake is perfect for make-ahead occasions! You can prepare it up to 3 days in advance and keep it refrigerated, or freeze it for up to 3 months. The berry topping may become slightly less vibrant over time, but the flavor and health benefits remain. For the freshest presentation, consider making the base and filling ahead, then adding the berry topping the day before your event.
Why did my berry layer soak into the cheesecake filling?
If your berry layer soaks into the filling, the most likely reason is that the filling wasn’t fully set before you added the topping. Always ensure the cream cheese layer is firm to the touch before adding the berry mixture. Additionally, make sure your berry mixture has cooled completely before pouring it over the filling. The health benefits of berries are maintained even if some mixing occurs, so the dessert will still be delicious!
How can I make a lighter, lower-calorie version while keeping the health benefits of berries?
To create a lighter version while preserving the health benefits of berries:
- Use reduced-fat cream cheese
- Substitute some of the cream with Greek yogurt
- Reduce the sugar in the filling by 25%
- Use fresh berries with a light glaze rather than a full gelatin topping
- Make a thinner base using fewer biscuits and less butter
These modifications create a lighter dessert while still featuring the antioxidant-rich berries as the star ingredient.
Try These Delicious Recipes Next!
If you loved this Berry Cheesecake, why not try these other mouthwatering desserts?
- Berry Icebox Pie
A refreshing and easy-to-make pie with a perfect balance of sweet berries and a creamy, smooth filling. - Raspberry Almond Cake
This moist cake combines the sweet tartness of raspberries with the rich flavor of almond, creating a delightful treat. - Chocolate-Covered Strawberries
Indulge in the perfect combination of fresh strawberries and decadent chocolate for a simple yet luxurious dessert. - Strawberry Lemonade Bars
A zesty and refreshing dessert bar, combining the tartness of lemon with the sweetness of strawberry for a perfect summer treat.
Explore these tasty treats and add more flavor to your dessert collection!
Print
Want to save this recipe?
Want to save this recipe? Enter your email below, and we'll send it straight to your inbox. Plus, receive new recipes every week!

Berry Cheesecake
- Total Time: 4 hours 20 minutes
- Yield: 12 1x
Description
A silky-smooth, no-bake cheesecake with a buttery biscuit base, creamy lemon-infused filling, and a vibrant berry topping rich in antioxidants. This stunning dessert requires just 25 minutes of preparation and lets the refrigerator do the rest of the work!
Ingredients
For the Base:
- 250g (9oz) digestive biscuits or graham crackers
- 113g (1 stick) butter, melted and cooled
For the Filling:
- 500ml (2 cups) heavy cream (30% fat)
- 225g (8oz) cream cheese, room temperature
- 85g (⅔ cup) powdered sugar
- Zest and juice from 1 medium lemon
- 3 tsp gelatin powder (optional)
- 2 tbsp boiling water (optional)
For the Topping:
- 1 can berries in syrup
- 3 tsp gelatin powder
- 2 tbsp boiling water
Instructions
- Process biscuits into fine crumbs in a food processor or crush in a plastic bag using a rolling pin.
- Mix cooled melted butter with biscuit crumbs until well combined.
- Press mixture firmly into the base of a lined springform cake tin and refrigerate.
- Whip cream until soft peaks form and set aside.
- Beat room temperature cream cheese and powdered sugar together until smooth.
- Add lemon zest and juice to the cream cheese mixture and combine well.
- If using gelatin, dissolve in boiling water and mix into the cream cheese mixture.
- Gently fold in the whipped cream until evenly incorporated.
- Pour filling over the chilled base and smooth the top. Refrigerate for several hours.
- Blend canned berries until smooth and strain through a sieve to remove seeds.
- Dissolve gelatin in boiling water and mix into the strained berry puree.
- Pour berry mixture over the set cheesecake filling and refrigerate for at least 4 hours or overnight.
- Serve topped with fresh berries and whipped cream if desired.
- Prep Time: 20 minutes
- Chill Time: 4 hours (minimum)
- Category: Dessert
- Cuisine: American
Nutrition
- Calories: 385 kcal
- Sugar: 18g
- Sodium: 210mg
- Fat: 28g
- Saturated Fat: 17g
- Unsaturated Fat: 9g
- Carbohydrates: 32g
- Fiber: 1g
- Protein: 4g
- Cholesterol: 89mg