


Getting basmati rice right on the stovetop can feel like a gamble every single time. Too much water and it turns mushy. Too little and you get crunchy, undercooked grains. Instant Pot Basmati Rice solves that problem completely, giving you light, fluffy, fragrant rice in about 15 minutes with almost zero effort. Whether you are cooking for a weeknight dinner or prepping meals for the week ahead, this method works reliably every time, even if you have never made rice in a pressure cooker before.
Why This Method Works (Before You Touch a Single Ingredient)
Most people assume the Instant Pot rice function is the right tool for the job. It is not. The pressure cook function gives you far more control over timing, which is exactly why this recipe uses it instead.
The other thing that trips people up is the water ratio. A straight one-to-one ratio sounds logical, but it does not account for the small amount of liquid that evaporates as the pot builds pressure. That is why this recipe uses a slightly higher ratio, which we will cover in the ingredients section below.
What You Need for Instant Pot Basmati Rice
The ingredient list here is refreshingly short. Three ingredients, and each one plays a specific role in the final result.
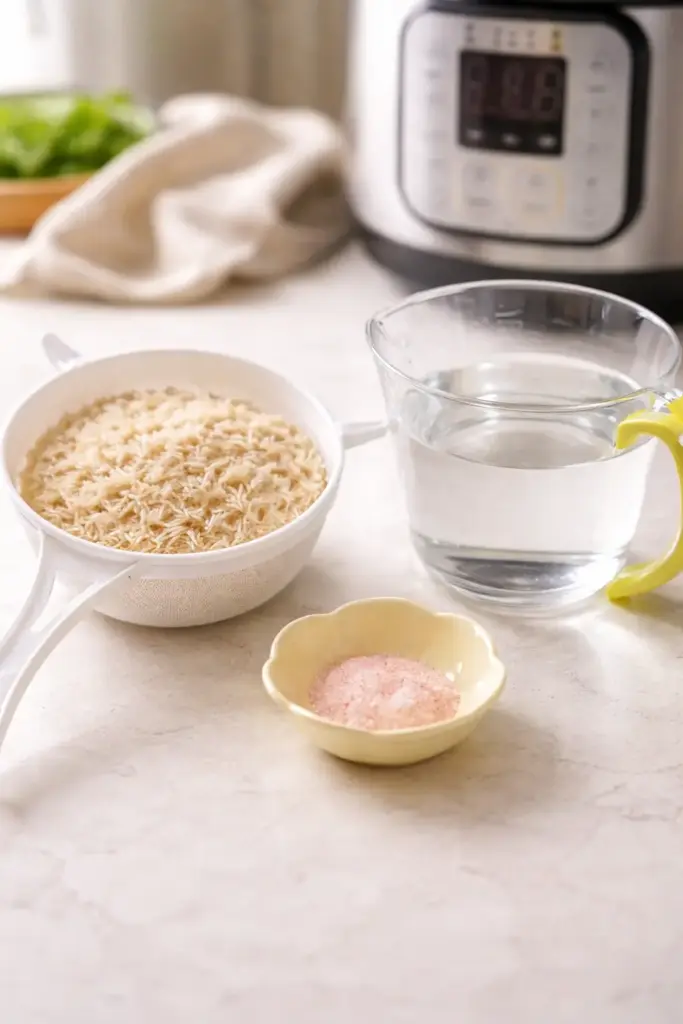
- 2 cups white basmati rice: Basmati is a long-grain variety known for its naturally nutty fragrance. When cooked correctly, the grains stay separate rather than clumping together. You can also use jasmine rice or other long-grain white rice varieties with this same method.
- 2¼ cups water (or low-sodium broth): The extra quarter cup beyond a straight two-to-two ratio compensates for the steam that escapes as the Instant Pot pressurizes. Skipping that quarter cup is one of the most common reasons rice comes out slightly undercooked at the center. If you use broth, low-sodium is strongly recommended so you can control the salt level yourself.
- ½ teaspoon salt: Adding salt before cooking, rather than after, allows the grains to absorb seasoning from the inside out. If you are using a salted broth, reduce or skip the salt entirely.
Why Most Homemade Pressure Cooker Rice Fails (and How to Fix It)
Before walking through the steps, it helps to know where things typically go wrong. These are the four mistakes that cause the most frustration with Instant Pot rice.
- Skipping the rinse: Unrinsed rice carries a heavy starch coating on the surface. That starch turns into a sticky, gluey layer during cooking. Rinsing takes two minutes and makes a visible difference in how separate the grains look on the plate.
- Using the rice function instead of pressure cook: The rice function on most Instant Pot models is calibrated for white rice in general, not specifically for basmati. The pressure cook function at high pressure for exactly 3 minutes is what delivers the right texture for long-grain varieties.
- Doing an immediate quick release: Releasing pressure the moment cooking ends causes the rice to seize up and become gummy. The 10-minute natural release is not optional. It is the step that finishes the cooking gently and keeps the grains intact.
- Leaving it on keep-warm too long without adding water: The keep-warm function continues to dry out the rice slowly. If you need to hold the rice for a few extra minutes, add a couple of tablespoons of water and keep an eye on it.
How to Make Instant Pot Basmati Rice: Step-by-Step
Step 1: Rinse Away the Starch for Fluffier Grains
Place your 2 cups of basmati rice into a fine-mesh Colander and rinse under cold running water for a few minutes. You are looking for the water running off the rice to shift from cloudy and milky to almost completely clear. That cloudiness is excess starch, and removing it is what separates fluffy individual grains from a sticky clump.
If the water still looks cloudy after two minutes, keep going. One thing to watch: rushing this step because the water looks “mostly clear” will still leave enough starch to affect the final texture.
Step 2: Combine Everything in the Pot for Even Seasoning
Transfer the rinsed rice into the Instant Pot. Pour in 2¼ cups of water or low-sodium broth, then add ½ teaspoon of salt. Stir gently to combine, making sure all the rice is submerged and none of it is clinging to the sides of the inner pot.
Adding salt at this stage rather than after cooking means the seasoning penetrates the grain as it absorbs water under pressure. The difference in flavor is subtle but real.
Step 3: Pressure Cook at High for Exactly 3 Minutes
Secure the lid, set the valve to the sealing position, and select the Pressure Cook (or Manual) function. Set the cooking time to 3 minutes at high pressure. Do not use the rice function. The pot will take several minutes to build pressure before the 3-minute countdown begins, which is completely normal.
If your Instant Pot model shows a different interface, the key settings are: high pressure, 3 minutes, sealed valve. Everything else is secondary.
Step 4: Let Pressure Release Naturally, Then Serve
Once the 3-minute cook time ends, allow the Instant Pot to naturally release pressure for 10 minutes. Do not touch the valve during this time. After 10 minutes, carefully switch the valve to venting to release any remaining pressure, then open the lid.
You will know the rice is ready when you open the lid and see distinct, separate grains with no pooling water at the bottom. Fluff immediately with a fork using a light lifting motion rather than stirring, which can break the grains. Serve right away for the best texture.
What Separates Good Instant Pot Rice from Great Instant Pot Rice
A few small habits make a consistent difference in the final result.
- Rinse until the water is genuinely clear, not just less cloudy. Most people stop too early. Give it a full two to three minutes under cold running water.
- Use broth instead of water when serving alongside a main dish. Low-sodium chicken or vegetable broth adds a quiet depth of flavor that plain water cannot replicate, without overpowering the rice itself.
- Fluff with a fork, not a spoon. A fork lifts and separates the grains. A spoon compresses them. That one tool swap changes the texture noticeably on the plate.
- Season before cooking, not after. Salt added to the cooking liquid gets absorbed into each grain. Salt sprinkled on top after cooking just sits on the surface.
Personally, I find that cooking the rice in low-sodium broth and seasoning lightly before cooking gives a result that needs almost nothing added at the table. The rice carries its own flavor rather than tasting like a blank side dish.
Serving Suggestions
Instant Pot basmati rice pairs naturally with a wide range of dishes across many cuisines. The long, separate grains hold up well under sauces and gravies without turning to mush.
- With braised or sauced proteins: The rice absorbs sauces beautifully without falling apart. Think chicken thighs in a tomato-based sauce, lamb curry, or a simple pan sauce from roasted vegetables.
- As a base for grain bowls: Cooked basmati rice holds its texture even after refrigerating, which makes it a reliable foundation for build-your-own bowls with roasted vegetables, legumes, and a drizzle of tahini or yogurt dressing.
- Alongside grilled fish or shrimp: The fragrance of basmati rice complements lighter proteins without competing with them. A squeeze of lemon over both ties the plate together.
Make It Once, Use It All Week
Cooked basmati rice stores well and reheats cleanly, which makes this recipe genuinely useful for meal prep.
Refrigerator: Store cooled rice in an airtight container for up to 4 days. Spread it out on a sheet pan or flat surface for a few minutes before containerizing to let steam escape, which prevents condensation from making the rice wet.
Freezer: Portion cooled rice into freezer-safe bags or containers and freeze for up to 3 months. Flatten the bags before freezing so the rice thaws evenly.
Reheating: Add 1 to 2 tablespoons of water per cup of rice before reheating. Microwave covered for 1 to 2 minutes, or warm in a covered saucepan over low heat. You will know it is ready when the grains have separated again and steam rises evenly from the surface, with no cold or hard spots remaining in the center.
Ready to Make the Easiest Rice of Your Life?
Basmati rice does not have to be a source of stress or guesswork. With the right water ratio, a proper rinse, and the pressure cook function doing the heavy lifting, you get fluffy, fragrant, perfectly cooked rice every single time.
Try this recipe tonight and see how straightforward it really is. Once you cook basmati rice this way, going back to the stovetop method will feel unnecessary.
Must Try Recipes
- Instant Pot Chana Masala — Complements the rice with a rich, spiced chickpea curry.
- Instant Pot Chicken Tikka Masala — A creamy, spicy pairing with your basmati rice.
- Jollof Rice — Try another rice dish for a flavorful twist.
Frequently Asked Questions About Instant Pot Basmati Rice
What is the correct water ratio for Instant Pot basmati rice?
Use 2¼ cups of water for every 2 cups of basmati rice. The extra quarter cup accounts for the small amount of liquid that evaporates while the pot builds pressure. A straight one-to-one ratio often results in rice that is slightly undercooked at the center.
Do I have to rinse the rice before cooking it in the Instant Pot?
Rinsing is technically optional, but it is strongly recommended. Rinsing removes the surface starch that causes grains to clump together. After rinsing, the cooked rice looks visibly more separate and fluffy compared to unrinsed rice cooked the same way.
Can I use the rice function instead of pressure cook?
For basmati rice, use the Pressure Cook or Manual function, not the rice function. Set it to high pressure for 3 minutes. The rice function is calibrated more broadly and does not give the same precise result for long-grain varieties like basmati.
Why do I need to wait 10 minutes before releasing pressure?
The 10-minute natural pressure release allows the rice to finish cooking gently using residual steam. Releasing pressure immediately causes the grains to contract suddenly, which results in a gummy or uneven texture. The wait is short and the payoff in texture is significant.
Can I cook more or less than 2 cups of rice using this recipe?
Yes. The cook time stays the same at 3 minutes on high pressure regardless of quantity. Simply maintain the same ratio: for every cup of rice, use 1 cup plus 2 tablespoons of water. Keep in mind the Instant Pot has a minimum liquid requirement, so do not go below roughly half a cup of liquid total.
Can I use broth instead of water for Instant Pot basmati rice?
Low-sodium broth works well as a direct substitute for water. It adds a quiet savory note to the rice without overpowering it. If using broth that already contains salt, reduce or eliminate the added half teaspoon of salt to avoid over-seasoning.
Tools That Make Instant Pot Basmati Rice Actually Work
Most failed attempts come down to the wrong equipment. These are the exact tools that get you the right texture, heat, and result every time.

Want to save this recipe?
Want to save this recipe? Enter your email below, and we'll send it straight to your inbox. Plus, receive new recipes every week!

Beginner-Friendly Instant Pot Basmati Rice Recipe
- Total Time: 15 minutes
- Yield: 6 1x
- Diet: Gluten-Free
Description
Following these simple steps will help you achieve perfect basmati rice in the Instant Pot!
Ingredients
- 2 cups white basmati rice
- 2¼ cups water (or a low-sodium broth)
- ½ tsp salt (or more to taste; less if using broth containing salt)
Instructions
- Begin by rinsing the rice in a fine-mesh strainer under cold running water for several minutes until the water appears clear. This step helps to remove excess starch, resulting in fluffier rice.
- After rinsing, transfer the cleaned rice to the Instant Pot, add the salt, and pour in the water or broth. Stir the mixture to ensure all the rice is submerged and not adhering to the sides of the pot.
- Depending on your Instant Pot model, activate the manual or pressure cook setting, adjusting the cooking time to three minutes. Secure the lid, ensuring the valve is set to the sealing position, and cook at high pressure for the designated time. Once completed, allow the pressure to release naturally for 10 minutes, followed by a quick release to eliminate any remaining pressure.
- Carefully open the lid of the Instant Pot, fluff the rice with a fork, and serve it warm.
Notes
1. TECHNIQUE TIP: Allowing the Instant Pot to naturally release pressure for 10 minutes ensures perfectly fluffy rice.
2. STORAGE: Store cooked rice in an airtight container in the fridge for up to 4 days; reheat with a splash of water for moisture.
3. SUBSTITUTION OR MAKE-AHEAD: Substitute water with low-sodium broth for added flavor or prepare rice in advance and reheat as needed.
- Prep Time: 2 minutes
- Cook Time: 3 minutes
- Category: Dinner
- Method: Instant Pot
- Cuisine: American
Nutrition
- Calories: 225 kcal
- Sugar: 1 g
- Sodium: 201 mg
- Fat: 1 g
- Saturated Fat: 1 g
- Unsaturated Fat: 2 g
- Carbohydrates: 49 g
- Fiber: 1 g
- Protein: 4 g


This is some delicious rice recipe! Thanks!