


Most homemade vanilla cakes end up dense, dry, or flat, and that one experience is usually enough to send people straight back to the box mix. The problem is rarely the baker. It is almost always a handful of technique gaps that nobody explains clearly. This vanilla cake recipe fixes that. With precise ingredient ratios, a handful of smart mixing techniques, and a silky buttercream that actually whips up light, you get a two-layer cake with a tender, cloud-like crumb that practically melts the moment it hits your tongue.
Why Most Homemade Vanilla Cake Fails (and How to Fix It Before You Start)
Three things quietly ruin most vanilla cakes: too much flour, over-mixed batter, and butter that is either too cold or too warm. Each one changes the texture in a way that no amount of frosting can cover up.
Too much flour makes the cake taste bready and dry. Over-mixing after the flour goes in activates gluten proteins that turn a delicate crumb into something dense and gummy. Cold butter refuses to cream properly, leaving a curdled, uneven batter.
Know these three failure points going in, and you are already halfway to a great result. The steps below are built around preventing exactly these problems.
Ingredients You Will Need
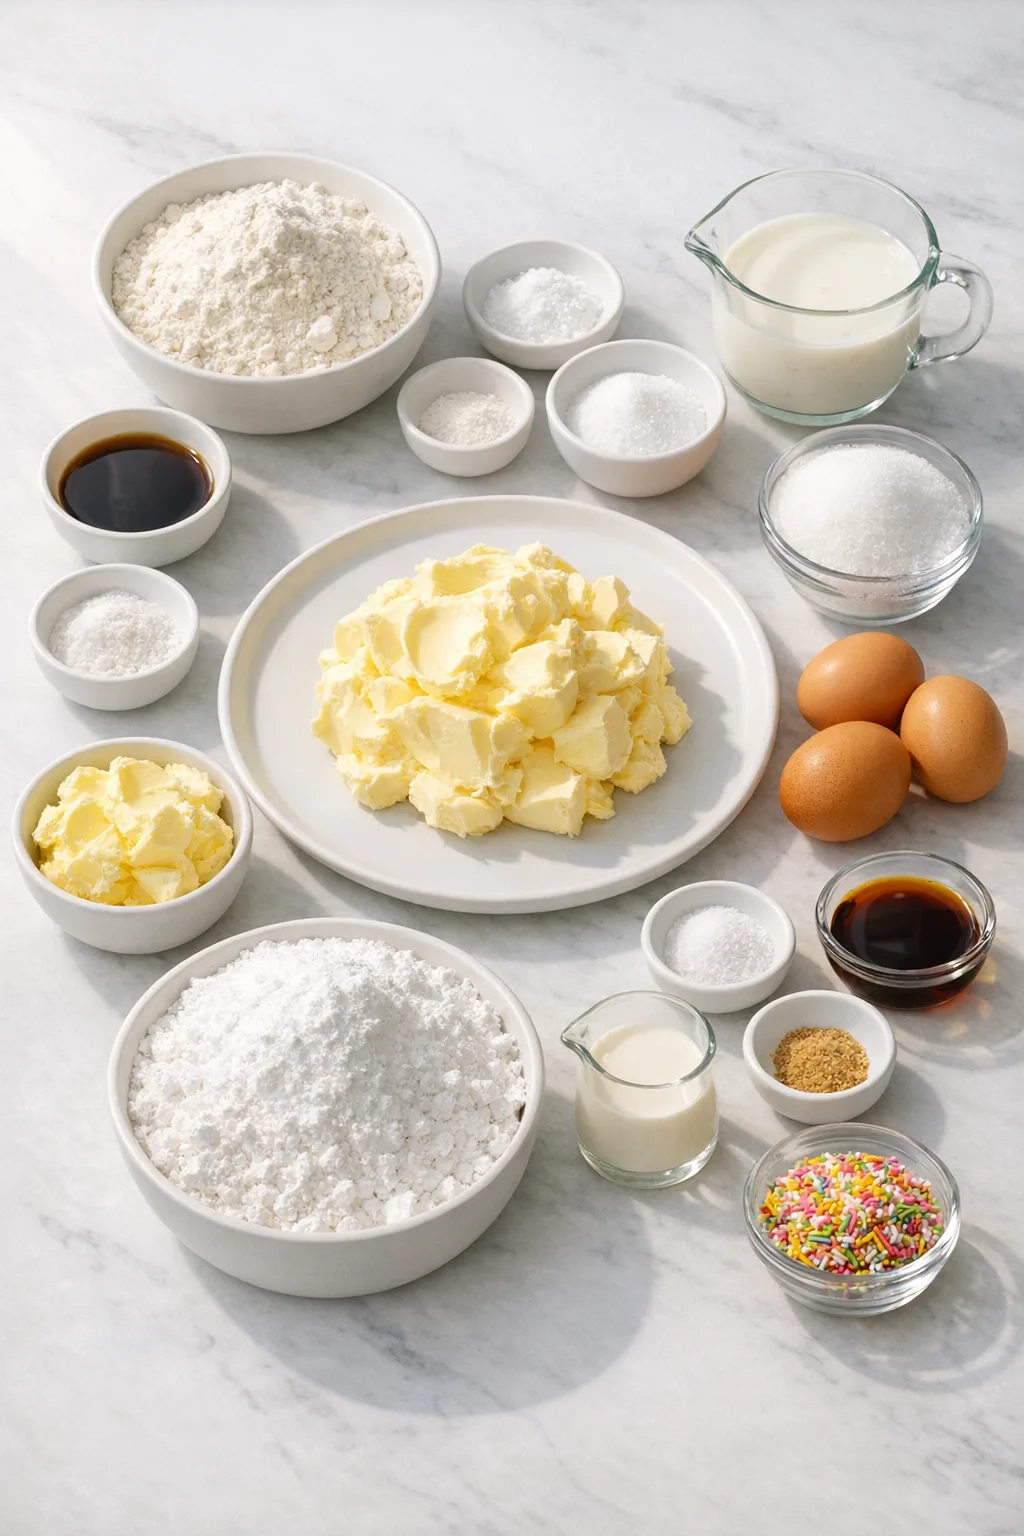
For the Cake
- 2½ cups all-purpose flour (300g)
- 2¼ teaspoons baking powder
- ¾ teaspoon salt
- 1⅔ cups granulated sugar (333g)
- ¾ cup unsalted butter, softened (170g)
- 3 large eggs, room temperature
- 1 tablespoon vanilla extract
- 1 cup whole or low-fat buttermilk, room temperature (240mL)
For the Vanilla Buttercream
- 1½ cups unsalted butter, softened (340g)
- ¼ teaspoon salt
- 5 cups powdered sugar (600g)
- ¼ cup heavy cream or whole milk, plus more as needed (60mL)
- 2 teaspoons vanilla extract
- Sprinkles for decorating (optional)
Why These Ingredients Matter
Buttermilk is slightly acidic, and that acidity inhibits some gluten development. The result is a tender, melt-in-your-mouth crumb rather than a chewy, bready texture. Do not swap it for regular milk without adding a splash of lemon juice or white vinegar first.
Granulated sugar does more than sweeten the cake. It actually softens the crumb by interfering with gluten structure. Reducing the sugar will make the cake less sweet, yes, but it will also make it noticeably denser and harder. Worth knowing before you adjust.
For the vanilla extract, use one that is dark in color and smells strongly of vanilla. A pale, thin extract with almost no scent will give you a pale, thin flavor. If you want to go further, you can steep vanilla beans in vodka or bourbon for a homemade extract that costs significantly less over time.
Step-by-Step Instructions
Step 1: Prepare Your Pans and Oven for Even Baking
Preheat the oven to 350°F. Grease two 8-inch round cake pans with butter and flour or baking spray, then line the bottoms with parchment paper rounds. If you have baking strips, soak them in water, wring them out, and wrap them around the outside of each pan.
The baking strips slow down how fast the outer edge bakes, which prevents the dome that forms when the center keeps rising after the edges have already set. You get flat, even layers that stack cleanly, with a softer edge texture throughout.
Step 2: Combine the Dry Ingredients for Uniform Rise
In a medium Mixing Bowl, sift or whisk together the flour, baking powder, and salt. Set this aside.
Whisking distributes the baking powder and salt evenly through the flour so every part of the cake rises at the same rate and tastes balanced. One thing to watch: if you scoop flour directly from the bag with your measuring cup, you will pack in far more than you need. Fluff the flour first, spoon it into the cup, and level it off with a straight edge. Better yet, use a kitchen scale and weigh out exactly 300g.
Step 3: Cream the Butter and Sugar Until the Mixture Looks Like a Pale Cloud
In the bowl of a stand mixer fitted with the Whisk attachment, or a large bowl with a Hand Mixer, beat the butter on medium speed until smooth, about 30 to 40 seconds. Add the sugar and beat on high for 2 to 3 minutes, scraping the bowl down once in between.
You will know this step is done when the mixture has turned noticeably lighter in color and looks almost fluffy. It should not look greasy or dense. If your butter was too cold, the mixture will look chunky and separate rather than cohesive. Soft butter, meaning your finger leaves an indent without much pressure, is non-negotiable here.
Step 4: Add the Eggs One at a Time to Build Structure Without Curdling
Reduce the mixer speed to medium. Add the eggs one at a time, scraping down the bowl between each addition. Once all three eggs are in, add the vanilla extract and mix on high for about 1 minute.
Adding eggs one at a time gives the fat and liquid time to emulsify properly. If you dump them in all at once, the batter can look curdled, like cottage cheese, which means the emulsion broke. That usually happens when the eggs are cold or added too fast. Room temperature eggs are important here. If you see the cottage cheese texture forming, slow down and let each egg fully incorporate before adding the next.
Step 5: Fold in the Flour and Buttermilk Without Overworking the Batter
Reduce speed to low. Add the flour in three batches, alternating with the buttermilk. Start and end with flour. Once the batter is almost combined, remove the whisk attachment and finish folding by hand with a spatula, scraping the sides and bottom of the bowl.
This is the most critical moment in the entire recipe. Once flour hits the batter, gluten starts forming with every turn of the mixer. Stop while there are still a few streaks of flour visible, then fold those in gently by hand. If you overmix here, the cake will shrink as it cools and become dense and gummy rather than light and springy. The finished batter should look fluffy and smooth, not elastic or stiff.
Step 6: Bake Until the Edges Pull Away and a Toothpick Comes Out Clean
Divide the batter evenly between the two prepared pans. Use an offset spatula to smooth the tops. Bake at 350°F for about 30 minutes.
The cakes are ready when the edges have visibly pulled away from the sides of the pan and a toothpick inserted in the center comes out clean. The center should spring back lightly when touched. If the toothpick comes out with wet batter, give it another 3 to 5 minutes and check again.
Step 7: Cool the Layers Completely Before Frosting
Allow the cakes to cool in the pans for about 10 minutes, then invert them onto a wire cooling rack. Peel off the parchment paper and set aside to cool completely before frosting.
Frosting a warm cake is one of the most common beginner mistakes. The buttercream will melt on contact and slide off the sides. The layers need to feel completely cool to the touch, not just warm on the outside. I have rushed this step before and spent twice as long trying to fix a melting frosting situation. It is not worth it.
Step 8: Whip the Buttercream Until It Turns White and Airy
Beat the softened butter and salt on medium-high speed for about 5 minutes until light and fluffy. Reduce to low and add the powdered sugar one cup at a time, drizzling in 1 tablespoon of cream between each addition. Once all the sugar is in, add the vanilla extract and increase speed to high for 1 minute.
The frosting will look dense and yellow at first. After 3 minutes on high speed, it transforms into something noticeably whiter and much lighter in texture. That color change is your visual cue that enough air has been incorporated. If the frosting feels too stiff, add a small splash of cream and mix again. Want a more dramatic finish? The technique in The Best Mirror Cake Glaze can take the presentation further if you want a professional-looking coating rather than a classic buttercream finish.
Step 9: Assemble and Finish the Cake
Spread about 1 cup of buttercream over the first cake layer. Place the second layer on top and cover the top and sides with the remaining buttercream. Smooth with a bench scraper or finish with rustic swoops. Add sprinkles if desired.
You will know the frosting is sitting right when it holds its shape without sliding and feels slightly firm to the touch on the surface. If the buttercream has been sitting out and feels soft or greasy, give it a quick re-mix before piping any decorative elements on top.
What Separates a Good Vanilla Cake from a Great One
- Use a kitchen scale. Measuring flour by volume is the single biggest source of inconsistency in home baking. Weighing out 300g every time guarantees the same result.
- Room temperature ingredients matter more than you think. Cold butter will not cream properly. Cold eggs can break the emulsion. Set everything out at least 30 minutes before you start.
- Do not skip the hand-folding at the end. Finishing the batter by hand gives you far more control than a mixer. You can feel when it is just combined.
- Baking strips are worth the effort. They produce noticeably flatter layers with a softer edge, which makes stacking and frosting much easier.
- Pump air into the buttercream. American buttercream gets a bad reputation for being too sweet and heavy. Extended mixing time changes the texture completely, making it light enough to rival a Swiss meringue.
Serving Suggestions
This cake works well as a birthday centerpiece, a celebration dessert, or an everyday treat that does not need a special occasion. The neutral vanilla base pairs with almost any filling you want to add between the layers: salted caramel, lemon curd, pastry cream, or fresh berry jam all work beautifully.
For a richer flavor profile, compare this to an Amazing Chocolate Bundt Cake, which has a denser, fudgier crumb and a more intense flavor. The vanilla cake is lighter and more versatile for layering and decorating. If you want something with a fruit-forward flavor profile, The Best Carrot Cake with Pineapple explores how fruit moisture changes the crumb in a completely different direction.
Storage and Make-Ahead Tips
Unfrosted cake layers can be wrapped tightly in plastic wrap and stored in the freezer for up to 3 months. This is genuinely useful for last-minute celebrations. Pull the layers out, let them thaw at room temperature, whip up the frosting, and assemble.
A fully assembled and frosted cake keeps well at room temperature for up to 2 days, covered. After that, refrigerate it. Cold buttercream firms up significantly in the fridge, so let refrigerated slices sit at room temperature for 20 to 30 minutes before serving. The crumb softens back up and the frosting loses that waxy, cold texture.
FAQs
Can I make this vanilla cake without buttermilk?
You can substitute by adding 1 tablespoon of white vinegar or lemon juice to 1 cup of regular whole milk. Let it sit for 5 minutes until it curdles slightly. The acidity mimics buttermilk well enough to keep the crumb tender.
Why did my cake dome in the center?
Doming happens when the outer edge of the cake sets and stops rising before the center does. Baking strips around the outside of the pan slow down the edge baking so the whole cake rises at the same rate. They are optional but make a visible difference.
Can I bake this as cupcakes instead?
Yes. Fill cupcake liners about two-thirds full and bake at 350°F for 18 to 22 minutes, or until a toothpick inserted in the center comes out clean and the tops spring back lightly when touched.
Can I use salted butter instead of unsalted?
You can use salted butter in both the cake and the frosting. If you do, skip the additional salt called for in each component. The flavor will be slightly different but still good.
Why does my buttercream look yellow and dense?
Under-mixed buttercream stays dense and yellow. After adding all the powdered sugar, mix on high speed for a full 3 minutes. The color shifts noticeably from yellow to near-white as air gets incorporated. That visual change tells you it is ready.
Can I reduce the sugar in this vanilla cake recipe?
Technically yes, but the texture will change. Sugar softens the crumb by interfering with gluten development. Less sugar means a slightly denser, more bready cake. The flavor will also be less rounded. If you do reduce it, start with a small adjustment rather than cutting it significantly.
Ready to Bake
A great vanilla cake from scratch is not complicated. It just requires understanding why each step matters, and now you do. The flour measurement, the creaming time, the hand-folding at the end: these are not arbitrary steps. Each one protects the texture you are working toward.
Make this one when you want a cake that actually tastes like something, not just sweet. The crumb is genuinely light, the frosting is far less cloying than most American buttercreams, and the whole thing comes together in a way that will make you wonder why you ever relied on a box. I think you will be glad you tried it from scratch.
Essential Kitchen Tools
Making Vanilla Cake? Most failed attempts come from using the wrong pan or heat setup — not the recipe itself.

Want to save this recipe?
Want to save this recipe? Enter your email below, and we'll send it straight to your inbox. Plus, receive new recipes every week!

Beginner-Friendly Vanilla Cake Recipe
- Total Time: 2 hours 45 minutes
- Yield: 12 servings 1x
Description
Soft and moist vanilla cake with a tender crumb, topped with a smooth, creamy buttercream frosting. This classic dessert is perfect for any occasion, providing a comforting and delightful experience with every bite.
Ingredients
- 2½ cups (300 g) all-purpose flour
- 2¼ teaspoons baking powder
- ¾ teaspoon salt
- 1⅔ cups (333 g) granulated sugar
- ¾ cup (170 g) unsalted butter, softened
- 3 large eggs, brought to room temperature
- 1 tablespoon vanilla extract
- 1 cup (240 mL) whole or low-fat buttermilk, brought to room temperature
- 1½ cups (340 g) unsalted butter, softened
- ¼ teaspoon salt
- 5 cups (600 g) powdered sugar
- ¼ cup (60 mL) heavy cream or whole milk, plus more as needed
- 2 teaspoons vanilla extract
- Sprinkles for decoration (optional)
Instructions
- Begin by preheating your oven to 350°F. Prepare two (8-inch) round cake pans by buttering and flouring them or lightly greasing with baking spray, then line the bottoms with parchment paper. Optionally, wrap baking strips around the outside of the pans.
- In a medium bowl, combine the flour, baking powder, and salt by sifting or whisking them together, then set aside.
- Using a stand mixer with the whisk attachment (or a handheld mixer in a large bowl), beat the butter at medium speed until it becomes smooth. Gradually incorporate the sugar and continue beating on high for 2-3 minutes until the mixture is light and fluffy, scraping down the sides of the bowl as necessary.
- Lower the mixer speed to medium and add the eggs one at a time, ensuring to scrape the bowl between each addition. Mix in the vanilla and blend on high until everything is well combined, which should take about a minute.
- Reduce the speed to low and alternate adding the flour mixture and buttermilk in three parts. Once the ingredients are nearly combined, switch to a spatula to gently fold in any remaining butter and flour by hand, being careful not to overmix the batter.
- Evenly distribute the batter between the prepared pans and bake for approximately 30 minutes, or until the edges begin to separate from the sides of the pans and a toothpick inserted into the center comes out clean.
- After baking, let the cakes cool in the pans for about 10 minutes, then carefully invert the layers onto a cooling rack, remove the parchment paper, and allow them to cool completely.
Frosting Instructions
- In the bowl of a stand mixer fitted with the whisk attachment (or using a large bowl with a handheld mixer), beat the butter and salt at medium-high speed until the mixture is light and fluffy, which should take around 5 minutes. Reduce the speed to low and gradually incorporate the sugar one cup at a time, adding 1 tablespoon of cream between each addition. Once all the sugar is mixed in, add the vanilla and increase the speed to high for about a minute.
- Take one cup of frosting and spread it over the first layer of the cake. Place the second layer on top and cover both the top and sides with the remaining buttercream. You can smooth it out or create a rustic finish with swoops or a spiral pattern.
Notes
TECHNIQUE TIP: For a fluffy cake, ensure the butter is softened and beat it well with sugar until light and airy.
STORAGE: Store the vanilla cake in an airtight container at room temperature for up to three days to maintain its freshness.
SUBSTITUTION: If you don’t have buttermilk, mix one cup of milk with a tablespoon of lemon juice or vinegar as a substitute.
- Prep Time: 15 minutes
- Cook Time: 30 minutes
- Category: Dessert
- Method: Baked
- Cuisine: American
Nutrition
- Calories: 750 kcal
- Sugar: 78 g
- Sodium: 329 mg
- Fat: 38 g
- Saturated Fat: 24 g
- Unsaturated Fat: 12 g
- Trans Fat: 1 g
- Carbohydrates: 99 g
- Fiber: 1 g
- Protein: 5 g
- Cholesterol: 144 mg