


Sourdough bread has a reputation for being intimidating, and honestly, that reputation is not entirely undeserved. The sticky dough, the timing, the starter that needs feeding before you can even begin — it can feel like a lot. But here is the truth: most of the process is hands-off waiting time, and once you understand what each stage is actually doing, the whole thing clicks into place. This sourdough bread recipe produces a loaf with a crackling crust, an open and airy crumb, and that distinctive tang that store-bought bread simply cannot replicate. The bulk ferment takes just 4 hours, and then the dough cold proofs in the refrigerator for anywhere between 8 and 48 hours, so you bake on your schedule, not the dough’s.
Why This Sourdough Bread Works Before You Even Start Baking
The biggest reason beginner sourdough loaves fail is not technique — it is misunderstanding the timeline. This recipe is built around flexibility. The cold fermentation window of 8 to 48 hours means you can mix dough on a Friday evening and bake Saturday morning or Sunday afternoon. That freedom removes the pressure that causes rushed decisions and flat loaves.
The stretch-and-fold method used during bulk fermentation also replaces the need for any aggressive kneading. Each fold builds gluten strength gradually, which is far more forgiving for new bakers than trying to knead a wet, sticky dough on a counter. Salt plays a dual role here too: it slows fermentation just enough to develop flavor while also giving the bread a better oven spring. These are not happy accidents — they are why this recipe works consistently.
What You Will Need: Ingredients for Sourdough Bread
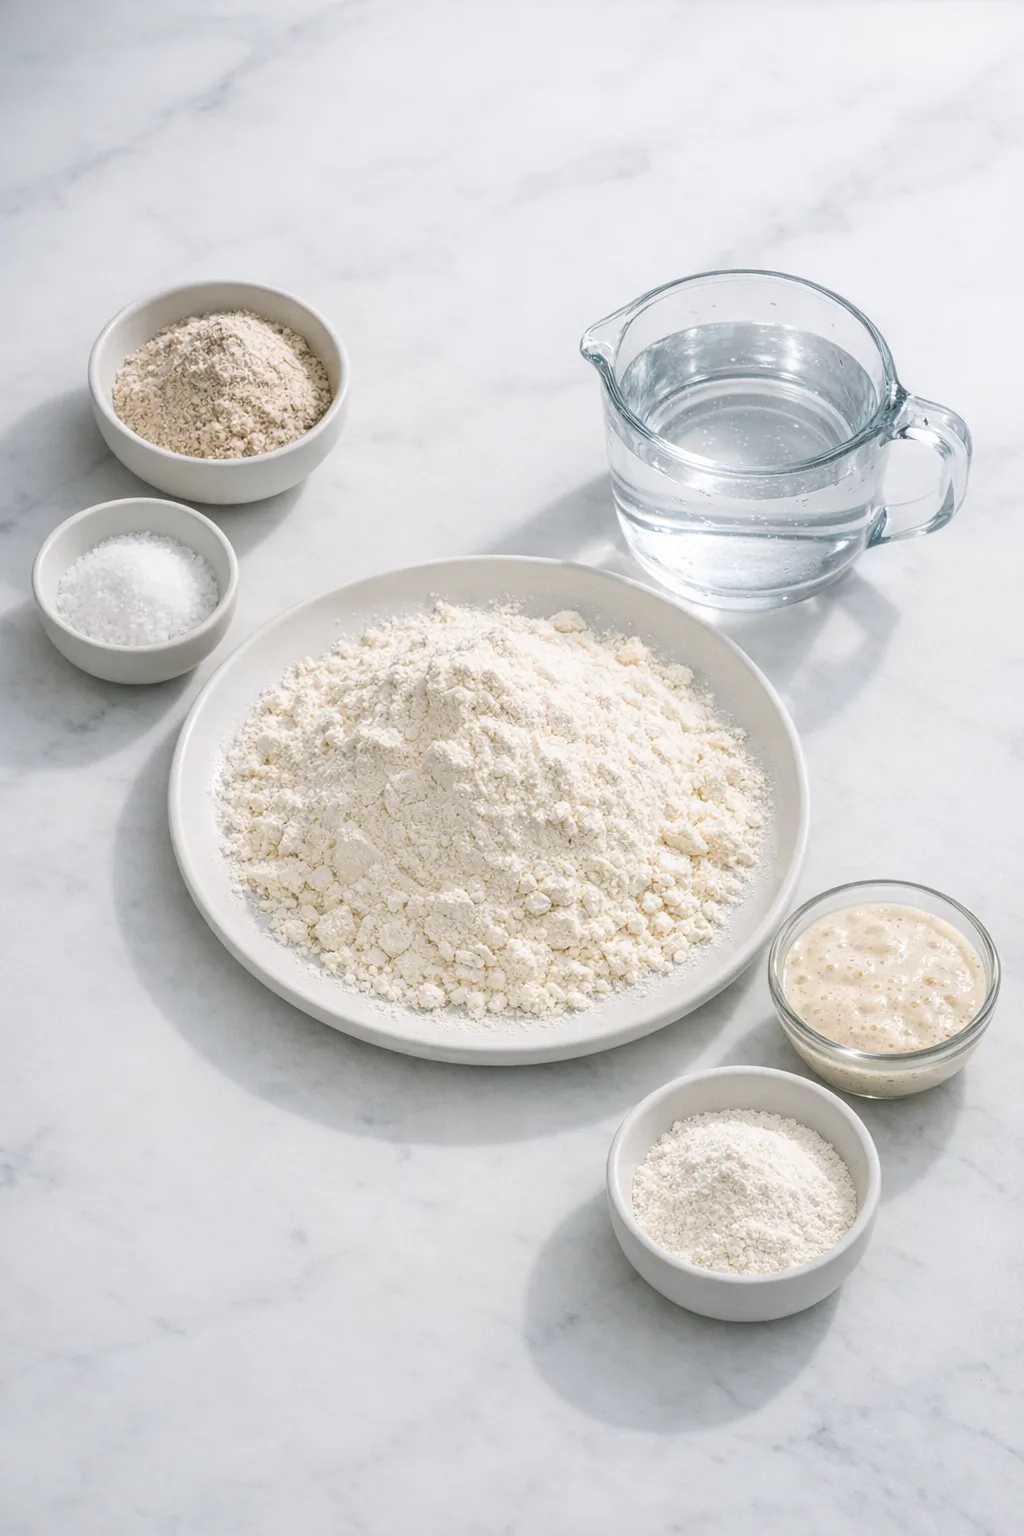
The ingredient list is short, but each one carries real weight. Use a kitchen scale — volume measurements are not reliable enough for bread baking at this level of precision.
- 400 g bread flour (or all-purpose flour, plus more for dusting) — bread flour has a higher protein content, which builds a chewier, more structured crumb. All-purpose works but produces a slightly softer result.
- 55 g rye flour (or whole wheat or bread flour) — rye adds a subtle earthiness and color. If you do not have it, simply use more bread flour.
- 10 g fine sea salt — do not skip this. Forgotten salt produces flat, flavorless bread that nobody wants to eat. Ask anyone who has made that mistake.
- 345 g filtered water (or dechlorinated or spring water, lukewarm up to 85°F) — chlorinated tap water can slow yeast activity. If you live in a high-humidity climate, you may need slightly less water than this recipe calls for.
- 100 g active sourdough starter — this is a starter that has been fed within the last 6 to 12 hours, has more than doubled in size, and looks bubbly and alive. If you have leftover starter after feeding, those unfed discards are excellent for making Sourdough Discard Crackers rather than throwing them out.
- Rice flour (optional, for dusting the banneton) — rice flour creates a crispier, more beautiful crust than bread flour and releases from the basket more cleanly.
Why Most Homemade Sourdough Fails (and How to Fix It)
Before getting into the steps, it helps to know where things typically go wrong. These are the patterns that show up most often in failed loaves.
- Using an inactive starter: If your starter has not peaked — meaning it has not more than doubled since its last feeding — the bread will not rise properly. Always use starter at its peak of activity, when it looks domed and bubbly on top.
- Skipping the tightening step: A loose, slack dough going into the oven produces a flat loaf. The bench rest and tightening sequence exist specifically to build surface tension. Do not rush past them.
- Cutting into the loaf while it is still warm: The steam inside the bread is still setting the crumb structure as it cools. Slice too early and the interior turns gummy and dense. Wait until the loaf is fully at room temperature — you will hear the crust crackle as it cools, which is a good sign.
- Scoring too shallow: A score that is too timid will not allow the bread to expand properly in the oven. Aim for 1/3 to 1/2 inch deep, held at a 45-degree angle, and be confident — hesitation shows in the final ear.
- Skipping the pizza stone: Without something to buffer the heat from below, the bottom crust can overbrown before the loaf is fully baked through. A pizza stone on the bottom rack solves this.
Step-by-Step Instructions for Sourdough Bread
Step 1: Wake Up Your Starter So It Is Ready to Work
Feed your sourdough starter one or two times before making your bread, depending on how active it is. For a single loaf, combine 50 g of starter with 50 g of all-purpose flour and 50 g of lukewarm water in a jar. Cover with a loose-fitting lid and let it rise at room temperature until it has more than doubled in size, about 4 to 6 hours. Place a rubber band around the jar at the starting level so you can track the rise clearly. You will know it is ready when the top is domed, the texture looks bubbly throughout, and it has visibly more than doubled — this is called an active starter and it is the engine of your bread.
Step 2: Combine the Dough Until No Dry Flour Remains
In a large mixing bowl, whisk together the bread flour, rye flour, and salt until evenly combined. Add the 345 g of lukewarm water and 100 g of active starter, then stir with a wooden spoon until the dough begins to come together. Switch to your hands and pinch and squeeze the dough thoroughly — your hands are genuinely the best tool here because you can feel when the flour is fully incorporated. The dough will be very sticky and wet. That is correct. Scrape down the sides of the bowl with a flexible scraper, cover with a clean kitchen towel, and let it rest.
Step 3: Build Gluten Strength Through Bulk Fermentation
Let the dough rest at room temperature for at least 4 hours. Every hour, perform a round of stretch and fold: wet your hands to prevent sticking, gently lift one side of the dough upward without tearing it, then fold it over onto itself. Rotate the bowl a quarter turn and repeat on the remaining three sides, or until the dough resists pulling. Cover between rounds. If your kitchen runs cool, aim for 70 to 75°F — an oven with just the light on works well for this. After 4 hours, you will do a fourth and final stretch and fold to tighten the dough. By this point, the dough should feel noticeably more elastic and resistant than when you started. If your dough still feels very slack after 4 hours, you can extend bulk fermentation by up to 2 hours — the dough should feel alive and slightly puffed, not flat and dense.
Step 4: Shape the Loaf to Match Your Baking Vessel
Turn the dough out gently onto a lightly floured surface — tip the bowl slowly so the dough eases out rather than being forced, which preserves the air bubbles built during fermentation. With floured hands, stretch the dough gently and shape it to match the shape of your banneton and pot. For a round loaf, fold each of the four sides into the center, pressing lightly, then turn seam-side down. For an oval loaf, alternate folding the sides from left to right all the way down, then roll tightly from top to bottom. If you want to explore other shapes with the same dough technique, Easy Sourdough Dinner Rolls use a similar fold-and-tighten approach but divide the dough into smaller portions for a completely different result.
Step 5: Rest the Dough to Relax the Gluten
Turn the shaped dough seam-side down, cover it with a kitchen towel, and let it bench rest for 20 minutes. This short pause allows the gluten to relax slightly after shaping, making the final tightening step more effective. One thing to watch: if the dough spreads significantly during this rest and loses its shape, do not panic — simply re-tighten it before moving on.
Step 6: Tighten the Surface for Maximum Oven Spring
If the dough has loosened during the bench rest, re-shape it now. With floured hands, cup the sides of the dough and tuck the edges underneath. Then pull the dough toward you along the counter in a gentle circular motion — the slight stickiness of the dough against the surface will help tighten the outer skin. Your goal is a taut, smooth surface that feels firm when you press it lightly. This tension is what creates a good oven spring and a defined ear after scoring.
Step 7: Cold Ferment for Flavor and Flexibility
Generously dust your banneton with rice flour (or bread flour), then transfer the dough seam-side up into the basket. Cover with a tea towel and refrigerate for at least 8 hours or up to 48 hours. The cold slows fermentation dramatically, developing the complex sour flavor that makes sourdough distinctive. If you plan to refrigerate for more than 24 hours, place the banneton inside a large zip bag to prevent the surface from drying out. The dough will rise slightly in the fridge but will not double — that is expected. The same cold fermentation principle that makes this loaf flavorful is what drives the dough in Sourdough Pizza Dough, which uses an extended cold rest to develop a similarly complex base.
Step 8: Preheat the Oven and Pot Together
At least 30 minutes before baking, place your Dutch oven or cast iron combo cooker inside the oven and preheat to 500°F. If you have a pizza stone, set it on the bottom rack at the same time. The pot must be scorching hot when the dough goes in — this is what creates the initial burst of steam that drives the oven spring. Do not rush this step; some ovens take closer to 60 minutes to fully saturate the pot with heat.
Step 9: Score the Bread to Guide Its Rise
Remove the dough from the refrigerator. If using a combo cooker, line the bottom with parchment and turn the dough out seam-side down into the hot pan. If using a Dutch oven, turn the dough out onto a sheet of parchment on the counter, score it there, then lift the parchment to transfer it into the pot. Using a bread lame, score a crescent shape starting at the base of one side, keeping the blade at a 45-degree angle and cutting 1/3 to 1/2 inch deep. Move confidently from one side to the other in a single motion. It is fine to go over the score a second time if needed — hesitation is the only thing that creates a ragged cut.
Step 10: Bake Covered, Then Uncovered for the Perfect Crust
Using oven mitts, cover the pot with its hot lid and place it in the oven. Immediately reduce the temperature to 450°F and bake covered for 20 minutes — the trapped steam is cooking the crust and allowing the loaf to expand fully. Remove the lid and bake uncovered for another 20 to 25 minutes, or until the crust reaches your desired color. Transfer the finished loaf to a cooling rack and let it cool completely to room temperature before slicing. You will hear the crust crackling as it cools — that sound means the structure is setting properly. Resist cutting in early.
What Separates a Good Sourdough Loaf from a Great One
- Use a kitchen scale, always. Volume measurements introduce too much variability in bread baking. Grams are precise, fast, and require no measuring cups to wash.
- Rice flour in the banneton makes a real difference. Bread flour tends to cling to the surface and creates a pale, floury crust. Rice flour brushes off cleanly after baking and reveals a much more beautiful, deeply colored crust underneath. I prefer rice flour every time now — it is a small change with a noticeable result.
- Keep the dough warm during bulk fermentation. The ideal range is 70 to 75°F. A cool kitchen will slow fermentation significantly and may require extending the bulk ferment beyond 4 hours.
- Do not skip the pizza stone. It buffers the intense bottom heat from the Dutch oven and prevents the base from overbrowning before the interior is fully baked.
- Freeze loaves the same day they are baked. Cut the cooled loaf in half, wrap each half in foil, and freeze in a zip bag. When thawed, the bread tastes genuinely fresh — not stale or compromised.
Serving Suggestions
A thick slice with salted butter at room temperature is the most honest way to taste what you have made. The crust should shatter slightly under the knife and the crumb should feel soft and springy when pressed.
Beyond that, sourdough bread works beautifully as the base for avocado toast, grilled cheese, or a BLT where the crust holds up to the moisture without going soggy. It pairs naturally with hearty soups and stews, where the chewy crumb is ideal for soaking up broth. Stale sourdough also makes exceptional croutons — the open crumb toasts unevenly in the best possible way, creating crispy edges and slightly chewy centers.
Make It Once, Use It All Week
Sourdough bread keeps well at room temperature for up to a week when wrapped in a bread bag, beeswax wrap, or a zip-top bag. Refrigerating is not necessary and can actually accelerate staling, so the counter is the better option for short-term storage.
For longer storage, wrap the fully cooled loaf (or half loaf) in foil, place it in a freezer bag, and freeze for up to 3 months. Thaw on the counter and the texture comes back remarkably close to the day it was baked. Baking two loaves at once and freezing one is genuinely the most practical approach — the recipe doubles easily and the extra loaf costs almost no additional effort.
FAQs
How do I know if my sourdough starter is active enough to bake with?
Your starter should have more than doubled in size since its last feeding and look visibly bubbly throughout. The surface will appear domed rather than flat. If it has not risen significantly within 4 to 6 hours of feeding at room temperature, feed it again and wait for it to peak before using it in the dough.
Can I bake sourdough bread without a Dutch oven?
A Dutch oven or cast iron combo cooker is strongly recommended because the enclosed space traps steam, which is what allows the bread to rise fully before the crust sets. Without it, the crust forms too quickly and the loaf cannot expand properly. If you do not have one, a heavy oven-safe pot with a tight-fitting lid is the closest alternative.
Why is my sourdough bread dense and not rising well?
The most common cause is an underactive starter. If the starter has not peaked before you use it, the bread will not have enough yeast activity to rise properly. The second most common cause is insufficient gluten development — make sure you are completing all four rounds of stretch and fold during the 4-hour bulk fermentation. Cold kitchens can also slow fermentation significantly, so check that your dough is resting somewhere between 70 and 75°F.
How do I get a good ear on my sourdough loaf?
The ear — that raised flap of crust — comes from a combination of proper surface tension during shaping, a confident score at a 45-degree angle, and a fully preheated pot. The score should be 1/3 to 1/2 inch deep and made in one smooth motion rather than a series of hesitant passes. A curved bread lame produces a more defined ear than a straight blade.
Can I skip the cold fermentation step?
You can, but the bread will have noticeably less sourdough flavor. If you need to bake sooner, cover the shaped loaf and let it proof at room temperature for 1 to 2.5 hours, or until it looks puffed but has not doubled in size. Then score and bake as directed. The texture will still be good, but the depth of flavor develops most fully during the cold rest.
Why is the bottom of my sourdough bread too dark?
This usually happens when the Dutch oven sits directly on a rack that is too close to the oven’s heating element with no buffer below. Placing a pizza stone on the rack directly beneath the Dutch oven absorbs and redistributes the heat, which prevents the base from overbrowning before the rest of the loaf is done. Also make sure your Dutch oven is positioned on the middle rack, not the lower third of the oven.
Ready to Bake Your First Loaf?
Sourdough bread asks for patience more than skill. The process is mostly waiting, and the waiting is where the flavor builds. Once you have made one loaf and understood what each stage looks and feels like, the whole thing becomes intuitive in a way that is genuinely satisfying.
Give this recipe a try on a weekend when you have a relaxed day ahead. Mix the dough in the morning, let it ferment through the afternoon, and wake up the next day to bake something that smells extraordinary coming out of the oven. The first slice, still crackling from the heat, with a little salted butter — that is the moment you will want to make it again.
Essential Kitchen Tools
Making Sourdough Bread? Most failed attempts come from using the wrong pan or heat setup — not the recipe itself.

Want to save this recipe?
Want to save this recipe? Enter your email below, and we'll send it straight to your inbox. Plus, receive new recipes every week!

Beginner-Friendly Sourdough Bread Recipe
- Total Time: 17 hours 20 minutes
- Yield: 1 loaf 1x
Description
Ingredients
- 400 g bread flour (or all-purpose flour, plus more for dusting)
- 55 g rye flour
- 10 g fine sea salt
- 345 g filtered water (luke-warm up to 85˚F)
- 100 g active sourdough starter
- Rice flour (optional for dusting the bread basket)
Instructions
- Feed your sourdough starter one or two times prior to baking your sourdough bread, depending on its health. For a single loaf, measure 50g of starter, 50g of all-purpose flour, and 50g of lukewarm water, mixing them together. Cover with a loosely fitting lid and allow it to rise at room temperature until it has more than doubled in size, approximately 4 to 6 hours.
- Prepare the Dough: In a large mixing bowl, combine the bread flour, rye flour, and salt using a whisk. Incorporate the water and sourdough starter, stirring with a wooden spoon, then use your hands to mix thoroughly, pinching the dough to ensure it is well combined. Expect a sticky dough. Scrape down the sides of the bowl and cover it with a clean kitchen towel.
- Bulk Fermentation: Allow the dough to rise for at least 4 hours, performing a round of “stretch and fold” every hour. With wet hands to avoid sticking, gently lift one side of the dough and stretch it upwards (being careful not to tear it), then fold it over itself. Rotate the bowl a quarter turn and repeat the stretching and folding about three more times or until the dough resists pulling. Keep the bowl covered with a towel between each round. After 4 hours, perform the stretch and fold for the final time to tighten the dough.
- Shape the Loaf: Transfer the dough onto a lightly floured surface (divide it in half if you are making two loaves). With floured hands, gently stretch the dough and shape it to fit your banneton (bread basket) and pot.
- Bench Rest: Place the dough seam-side down, cover it with a towel, and let it rest for 20 minutes.
- Tighten the Dough: If the dough loses shape during the bench rest, gently reshape it to tighten the loaf. With floured hands, cup the dough’s sides and tuck them underneath, pulling the dough towards you in a circular motion to firm up the shape.
- Cold Fermentation: Place the dough seam-side up in your floured banneton. Cover it with a tea towel and refrigerate for a minimum of 8 hours or up to 48 hours.
- Preheat the Oven: At least 30 minutes before baking, position the Dutch oven or combo cooker in your oven (if using, place your pizza stone on the bottom rack) and preheat to 500°F.
- Score the Bread: Carefully turn the bread out onto a parchment-lined combo cooker or a sheet of parchment paper or bread sling if using a Dutch Oven. Using the bread lame, score the bread starting at the base on one side, maintaining a 45-degree angle and creating a 1/3 to 1/2 inch deep crescent shape, cutting around the top of the bread from one side to the other. If using a Dutch Oven, utilize the parchment to transfer the dough into the pot.
- Bake: Wearing oven mitts, cover the dough with the hot lid and place it in the oven. Immediately reduce the heat to 450°F and bake for 20 minutes with the lid on. Remove the lid and continue baking for an additional 20 to 25 minutes uncovered, or until it reaches your desired color.
Notes
TECHNIQUE TIP: Master shaping and scoring to ensure your bread looks stunning every time.
STORAGE: This bread freezes well, making it easy to prepare in advance and enjoy later.
SUBSTITUTION: Use whole wheat flour or bread flour in place of rye flour for a different texture.
- Prep Time: 20 minutes
- Resting Time: 16 hours 20 minutes
- Cook Time: 40 minutes
- Category: Bread
- Method: Baked
- Cuisine: American

